

Easter! So looking forward to it this year. Last year Western Australia not only had a hard border between us and the other states of Australia but also, at Easter time, regional borders preventing us from seeing our Son or my Mother. This year will be different. Currently there are no internal borders, our son will be staying with us and we will go and visit family.
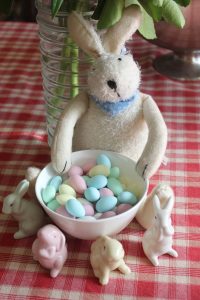
I have already put out some Easter decorations, many of them remnants from my teaching days when I really enjoyed setting up lots of Easter themed things in the classroom. Loved hiding Easter eggs in the children’s desks the last day of term before the Easter break and hearing about their holiday plans.
This year I wanted to make papier mâche Easter eggs. I’ve seen some in decorator shops but wanted to try them myself. Papier mâche literally means ‘chewed paper’ but really it is layers of paper glued together to create a strong material.

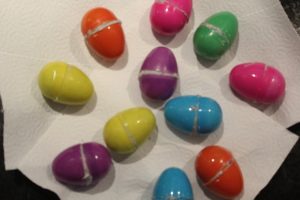
I gathered plastic eggs which pop open (intended to be filled with little gifts), some diluted PVA, some torn newspaper and a protective cover for the work surface.
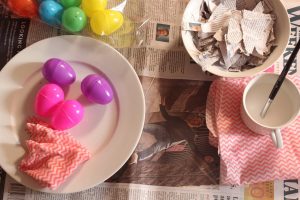
Clockwise from right hand corner, torn newspaper, diluted PVA glue and dry hand wipe cloth, wet hand wipe cloth and the plastic molds.
Layered strips of paper on each egg until I was happy they were well covered and left them to dry. Spent days trying to decide if I’d cover them with printed text, paint them white and draw images on them or paint them in different colours. Finally decided to paint them with a white undercoat then a pink coat and the speckled with burnt umber, using a toothbrush.
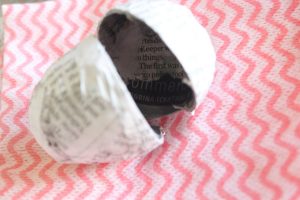
To remove the plastic mold I sliced around each egg using a Stanley trimmer, leaving a little hinge, then eased the egg out before gluing some strips over the cut and sealing the egg.
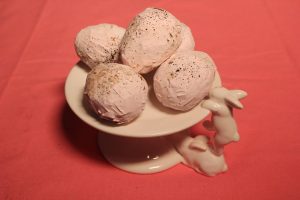
The papier mâché eggs are strong and light.
Then I was about to empty the shredder. All the strips of paper in the shredder basket reminded me I’d seen paper clay made from shredded paper somewhere. Went hunting and found a recipe which used things I already had on hand. I planned to fill the Easter egg molds I’d used for the papier mâché eggs and create some solid eggs
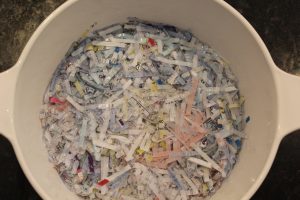
Soaked about four cups of shredded paper in hot water for a few hours.
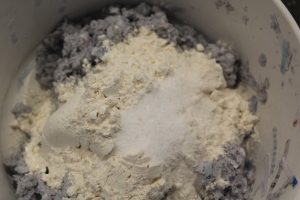
Paper pulp, flour and salt before kneading to a smooth clay.
I emptied about four cups of shredded paper into a glass bowl and covered it with hot water. Left it to soak for a few hours. Used a Bamix to reduce it to pulp which took a while. Scraped the pulp into a sieve and squeezed out most of the water but not all of it. Added a cup of plain flour and a scoop of salt and kneaded it. Too sticky, so added, gradually, another cup of flour. Felt right. Kept kneading it until it was smooth and clay like in consistency.
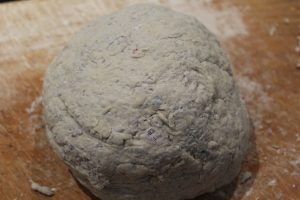
Kneaded to a smooth clay.
Using a teaspoon I filled each end of the egg mold, then tried to snap the mold shut. Scraped away the oozing clay but they still didn’t stay shut. This turned out to be a good thing as the extra, oozy clay was useful to smooth over the join later.
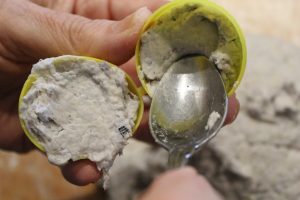
Left them to dry on paper towel on a tray. It was 38° C the day I made these and when we were home we had the air conditioning on. So I felt they were drying very quickly. I popped each egg halfway out of the molds, shaped them a little as they were still pliable and left them to dry until the morning. Then I used a teaspoon to remove the other half, shaped them a little and smoothed the rim around the join mark and left them to dry.

The problem with the paper clay, which I didn’t anticipate, was it shrunk as it dried and it didn’t shrink evenly. I ended up with lumpy eggs which no self respecting chook (chicken) would lay claim to (pun intended)
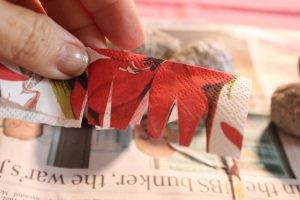
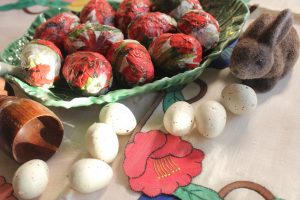
Covered the lumpy eggs using beautiful paper napkins from Michel Design Works, made in Germany in Christmas Time pattern. I cut a rectangle slightly greater than the circumference of the egg and about the length of the egg. Folded the rectangle in half longways. Cut V shaped notches about a third of the way in on both long edges, then applied diluted PVA glue to one side and the middle strip. Rolled the egg onto the paper, pressing smoothly as I rotated it, smoothed down the end and then glued and smoothed down the other, notched edge. Left them to dry. Later I sealed them with gel medium .
These were easy and enjoyable activities, but also time consuming. I have a ziplock bag of left over paper clay in the fridge and will make something with that, too, maybe a bowl. It will probably dry quickly as the walls will be of an even thickness. After Easter I’ll store the eggs along with the other Easter decorations for use next year.
EASTER DECORATIONS
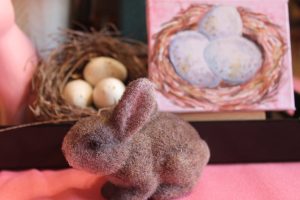
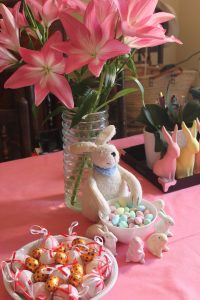
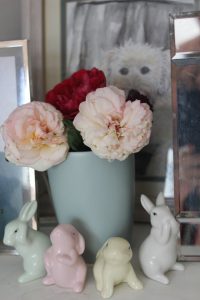
I have a little canvas easel as part of a tableau on a tray on the table. Originally I painted some leaves on it, then during summer I glued an image of a pink peony on it, to compliment the pink alstromerias and pink lilies I often have on the table.
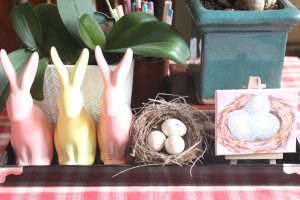
Easter was coming and I wanted a new image. Really like the little rescued nest which is part of the display so added faux speckled eggs. That motivated me to paint a nest with speckled eggs on the small canvas. It will probably only last a few weeks before I decide to do something else on it! Eggs and other Easter themed decorations are all about Spring. In the Southern Hemisphere we are in Autumn, but 35° C at the moment, so still waiting.
The lilies, rabbits and painted nest with eggs dictated a pink theme. Added a pink tablecloth I am enjoying it for a change and really liking the pink lilies, too.
Did you know March is nutrition month? There’s so much information available about what we should eat that this is an easy month to celebrate. Eat well!