

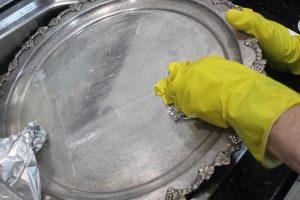
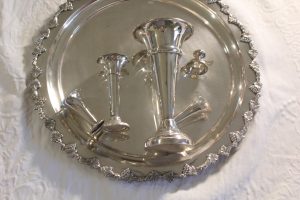
cleaning the silver
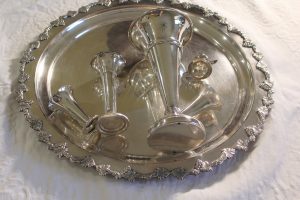
Christmas preparations are much the same each year in this house. Apart from cooking and decorating I like the silver to be polished! I know, who cares? Well, I do! So I filled the sink with sheets of aluminum foil, a good shake of baking soda and hot water then dipped the tarnished pieces, leaving each piece for a minute then taking it out. Rinsed, then polished. Some of these pieces were so tarnished we had to clean and polish them with silver cleaner.

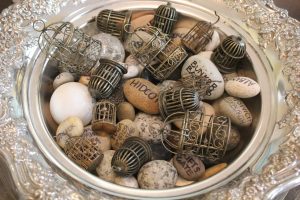
This was a good opportunity to wash all the bits and pieces I keep in the silver bowl. Time to refine the contents! The pebbles I’ve collected all over the world went back in and also my collection of miniature birdcages remained. Other bits and pieces went out! Also cleaned and sorted a long neglected cupboard. Little steps and so much more to do to declutter.
The discarded decorative pieces and lots of other things were all dropped off at the Salvation Army depot in town. Still more ‘treasures’ need to go but I find the process quite hard. Been loaned a very motivating book but I lose momentum rather easily.
dosing the cake
I made two Christmas cakes a few weeks ago. Three days ago my husband used a skewer to poke holes in the top of each cake. Next he poured the remaining port from macerating the fruit onto both cakes. Smelt wonderful. Moist, delicious and very popular.
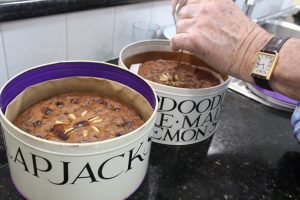
I make the cakes using an old, photocopied, stained recipe from my Aunt, via my Mother. The ingredient list is very long although once everything is gathered and measured the process is actually quite quick. Every now and then I tear a recipe for Quick and Easy Christmas Cake, or No Fuss Christmas Cake or something similar from the paper and without fail, they have been mere shadows of the cake made from this treasured family recipe. Lesson learnt. Now I just plan a day for cake making as it takes at least four hours to cook! And weeks to macerate the fruits in port.
adding a pocket to a shirt
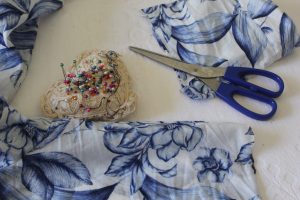
Had this light summer shirt for a while but I’ve only worn it once. The sleeves are very full and flappy so it felt too big. The other problem was it doesn’t have a pocket, so I’m always having to carry my phone or keys when I go out for a walk. Solution became obvious when I looked at it this morning.
I cut the sleeves to elbow length and folded and pinned a hem on the remaining, trimmed sleeves.
Trimmed one of the cut off sleeves to create a pocket. I left the existing cuff on the piece then turned and pinned the raw edges before pinning the now ironed pocket to the shirt.
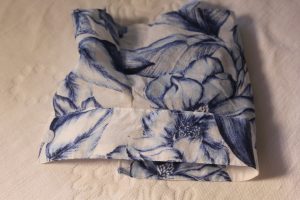
Left the existing cuff from the sleeve as an edge on the pocket. The fabric is lawn and is quite thin so the cuff creates extra strength for the pocket.
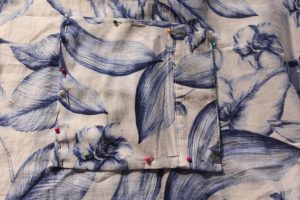
I put the shirt on and pinned the pocket exactly where it was easy to access. Also ensured my phone fitted comfortably.
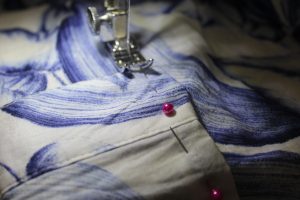
Ironed the pinned edges, then sewed them on place. Checked the sleeve length was right. Ironed the shirt, been wearing it all day. Considered making two pockets but I don’t really need two and I have a long TO DO list, anyway.
making biscuits
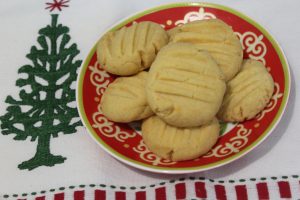
This time of the year is party time and many invitations ask you to ‘bring a plate’. This is an Australian tradition and involves taking a plate of food to share. I have a few invitations this week where I need to take a plate. This can be tricky when there’s no fridges available as the gatherings are outdoors. My solution is shortbread biscuits!
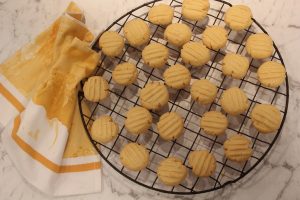
They don’t need refrigeration, cutting up or extra sauces or topping. You don’t need napkins and you don’t need to wash your hands afterwards. Easy!
saving seeds
The heat of summer has begun so it’s time to reduce the number of pots needing hand watering. I’ve also saved the ranunculus corms and red poppy seeds for next year. I intended saving the tulip bulbs, too, but only found their skins. The wild life had enjoyed a feast of tulip bulbs!

I store the collected seeds in brown paper bags pegged up high in the cool garage until it is time to plant again next year.
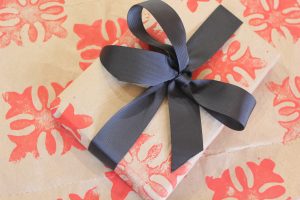
wrapping gifts
Printed this paper using brown packing paper, acrylic paint and a stamp. I smoothed out the paper and ironed it before printing on it. If you want to try this but want perfectly smooth paper, lightly spray it with a mist of water, then iron.
I hope all your holiday plans involve wonderful food and fun get togethers, plus lots of sleep!