

kitchen devices
I needed to use up some mince in the fridge. I looked up Nagi’s Recipe Tin Eats site to see how she makes rissoles as a change from the usual way I make them. Her recipe included grated zucchini, grated carrot and grated onion. Bit off putting as I typically hand grate using either an old fashioned box grater or a grater resting over a bowl. and it takes ages. Our son, who is a keen cook and was staying with us, said, ‘Use the grating device on the processor.’
The processor is older than him and regularly makes superb shortbread dough, mixes great pastry, purees and other things requiring the normal mixing blade. He rummaged around in the appliance cupboard and found a grating disk, the frame it sat on, the lid with a chute and a thing to poke the vegetables down the chute. Within seconds I had a mound of finely grated carrot, zucchini and onion.
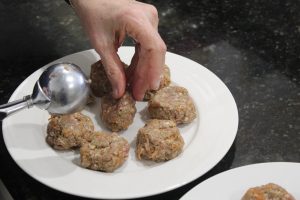
One kilo of mince and a mound of grated vegetables made a lot of rissoles. I used an icecream scoop to scoop out the mixture from the bowl to make the round shape.
Still had more zucchini so once I’d mixed the rissoles I put the whole thing together again and grated the zucchini to make a zucchini slice. It’s fair to say this grating plate is my new interest. We will be eating lots of things with grated vegetables and cheese. The zucchini slice, a blast from the past, will also make three dinners with added vegetables.
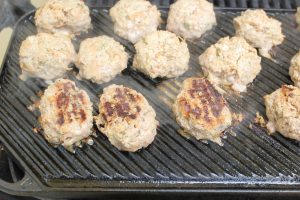
The rissoles were cooked on the barbecue. The best part? Two more dinners of rissoles now labeled and in the freezer.

CHRISTMAS BAUBLES
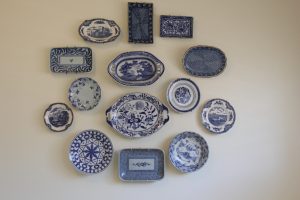
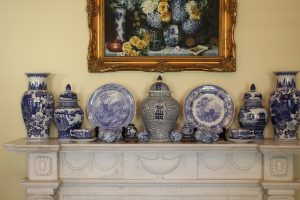
English, Japanese, Korean, German and Chinese blue and white plates on a bathroom wall.
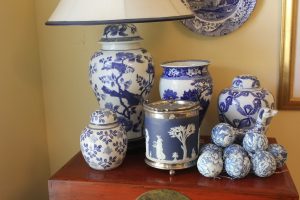
Are you a fan of blue and white Chinoiserie decorated china? I’ve always loved the various blue and white patterns and have some of my Grandmother’s very old pieces, some from my Mother and a lot I have bought for myself. When we lived in China I bought pieces made in Japan and Korea and a lot made in China. Some pieces were bought from shops, some from roadside stalls and a few pieces came from antique markets.
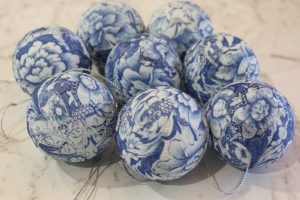
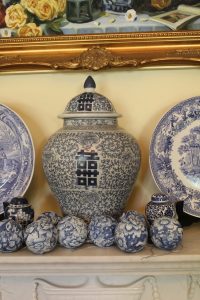
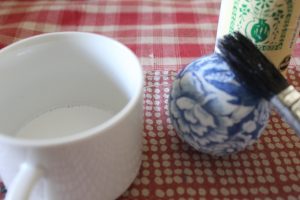
Many of these blue and white pieces are now around our home. Earlier this year I bought some plain white Christmas baubles intending to decorate them with blue and white patterned paper, in this case, deconstructed three ply paper napkins. We don’t put up a massive amount of Christmas decorations anymore, so I decided on a simple theme, featuring blue and white pieces.
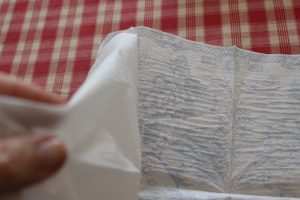
I carefully peeled the printed sheet from the two other layers of these paper napkins. I’ve seen both three ply and two for sale locally. I cut small images from the decorated sheet and glued them to the bauble until the entire surface was covered in blue and white paper. I’ve seen other people posting about decorating Christmas baubles and they simply cut or tear the printed sheet into small pieces and glue them on. Each way seems to work well.
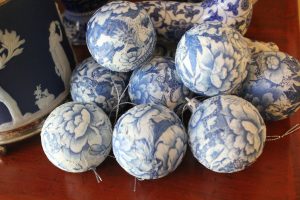
I think blue and white baubles will feature a lot this Christmas.
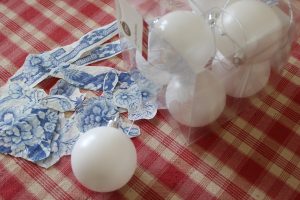
When the entire surface of the bauble was covered I hung it to dry and began another one. I bought the baubles well after Christmas and was limited to plain ones and a few with a textured surface. I was going to leave the textured ones but decided to try gluing the paper on, anyway, and it worked perfectly.
When they were dry I sealed them with a craft sealant. When I make more I will spray a glossy enamel finish on them as the first batch look a bit dull. And I will make more because it was fun and they look very pretty.
So. if you’re inspired to try this, you need some white Christmas baubles, paper napkins with colours and images you like, scissors and a glue stick or Mod Podge and sealing spray if you’re not finishing off with Mod Podge. (I used some of the removed white paper layers to rest the drying baubles and to wipe my hands. Later I used the leftovers to clean up.)
To decorate a bauble remove the hanging attachment (the silver or gold coloured clip at the top). I couldn’t remove them from the baubles I used so I just made sure the paper sat cleanly around the base. Most commonly, people use Mod Podge to glue then seal the papers. I just used a glue stick and it worked really well. (My Mod Podge is very old and has gone thick and attempts to dilute it weren’t successful)
I cut out images from the patterned paper. It isn’t necessary but I like the clean cut edge. You can tear the paper, too. I just glued the images onto the bauble until the entire surface was covered. I washed my gluing hand when it got sticky and kept going. Left the baubles to dry. So satisfying. When they were all dry I sealed them with craft sealer but will spray them later with gloss enamel.
Can’t stop making baubles! Off to hunt down more plain white baubles to decorate. The collection has doubled and I’ve seen more white baubles in the shops now that Christmas decorations are for sale.

Please let me know if you try this project. I’d love to see your finished product!