Elastic Holder For My Journal

Share this post
Share

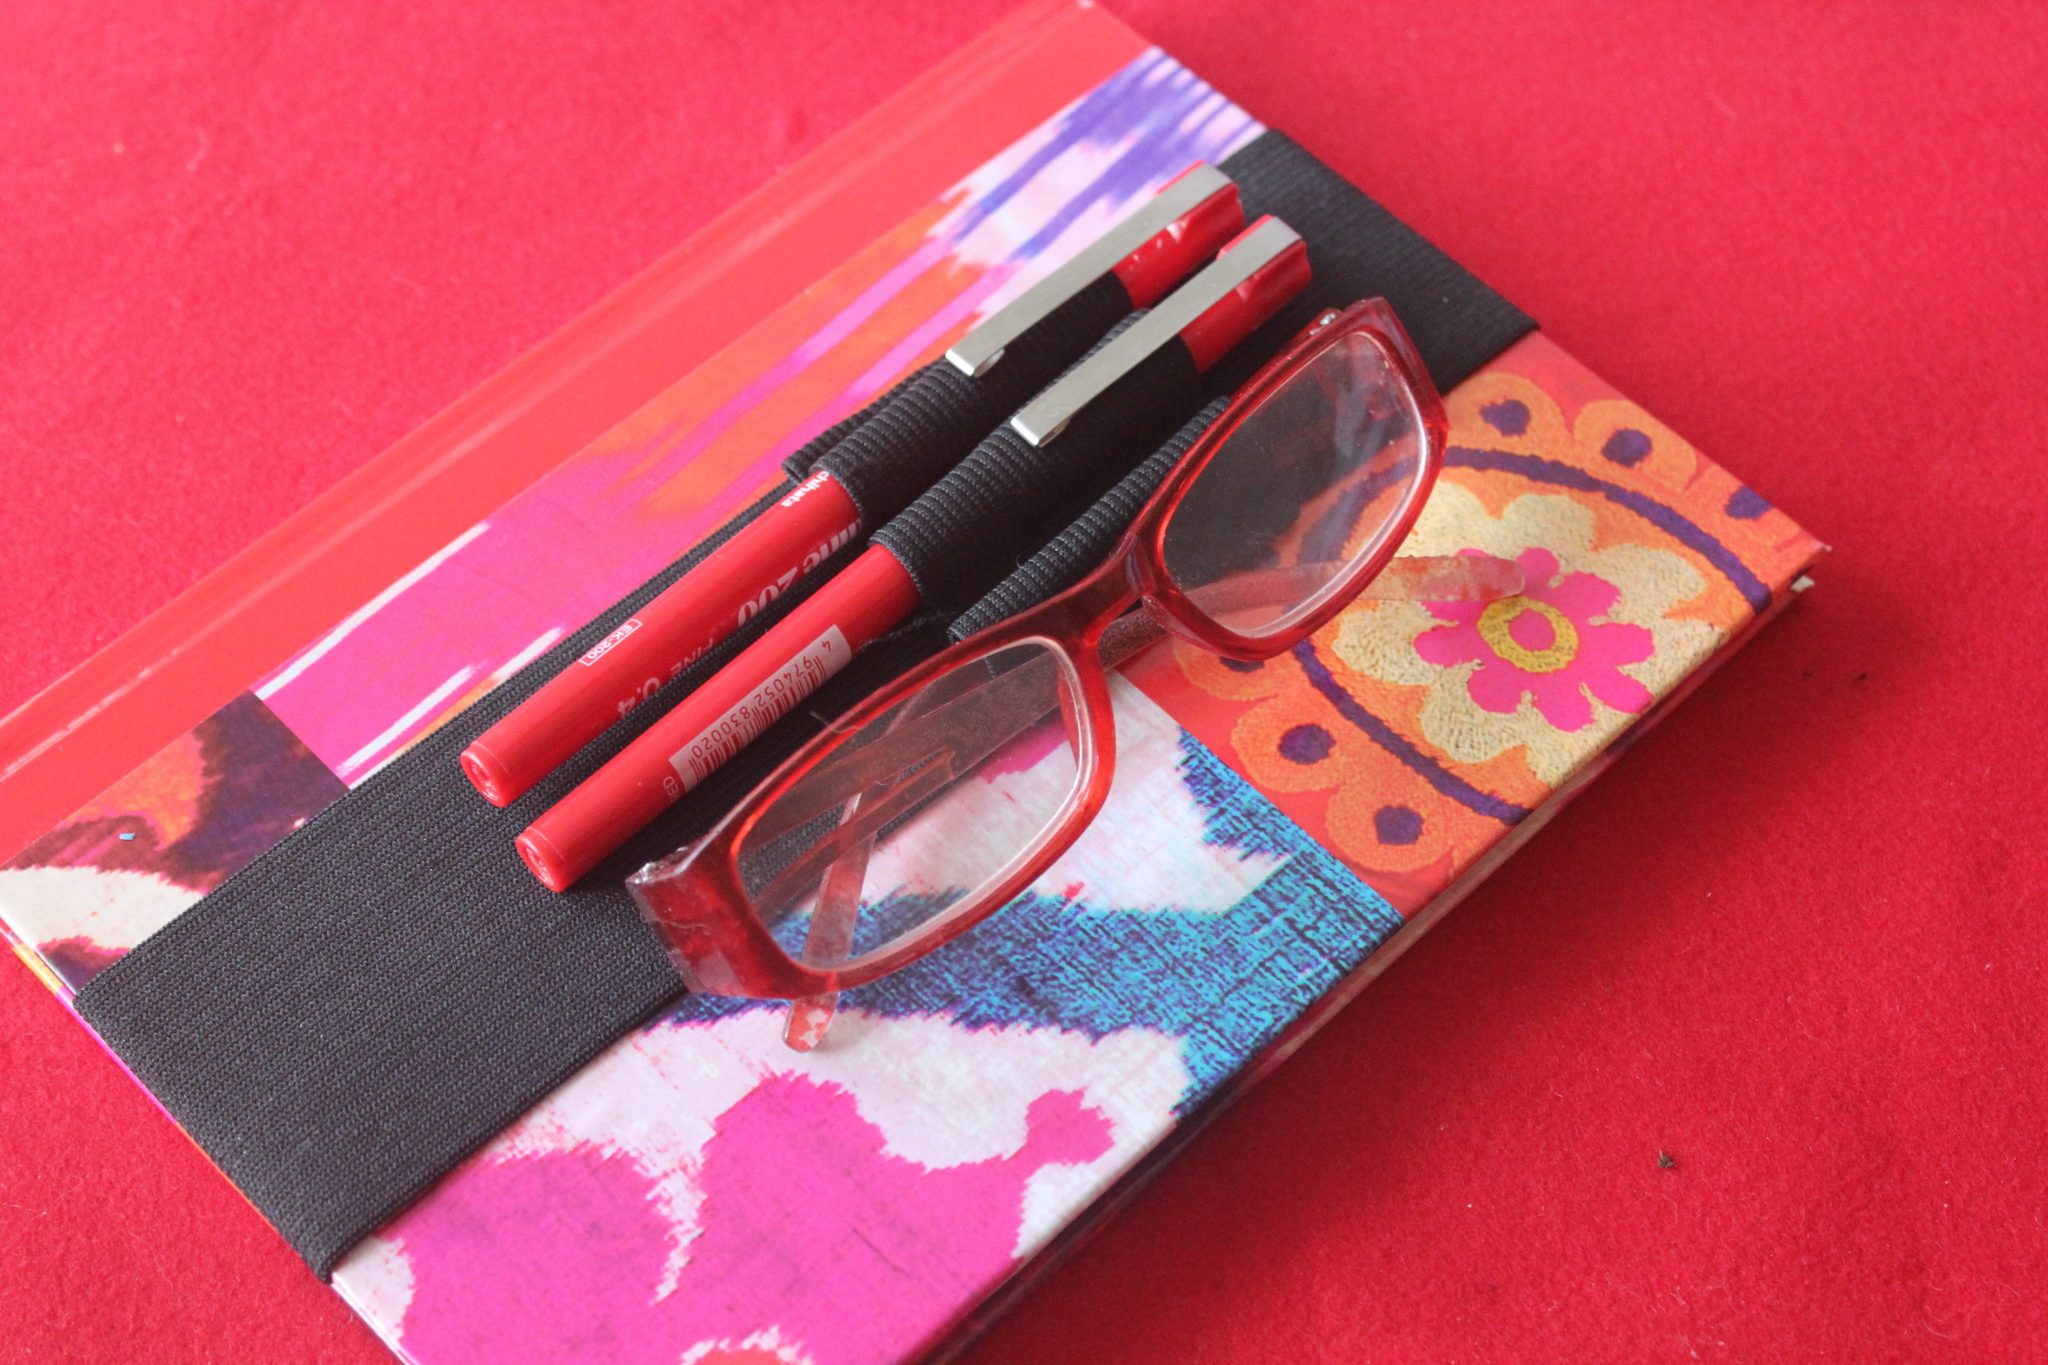
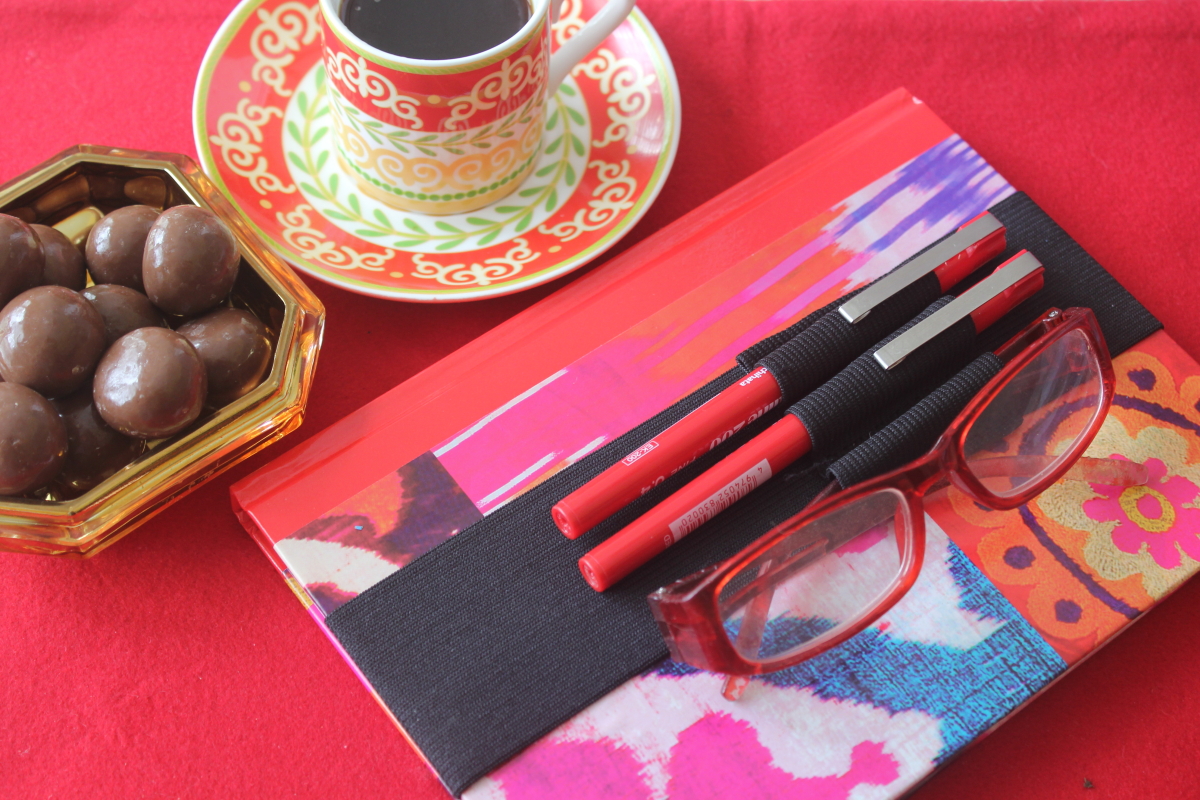
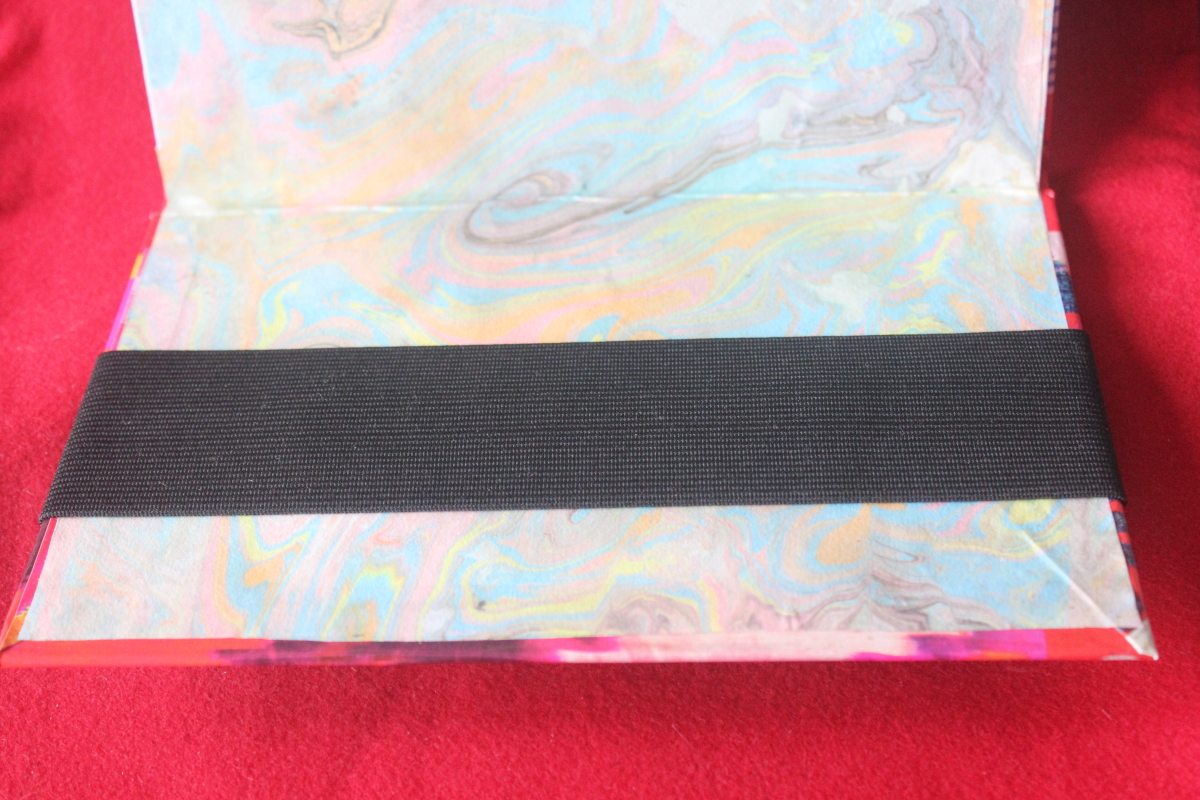
This is the final activity!  I showed you how I covered the journal, then I showed you how I marbled paper for the inside covers and now, I’ll show you how I make the elastic holder which slips over the front and holds necessary pens and for me, glasses. This band is so useful! Not only does it hold things but I can easily slide it off my full journal to put it on a new one. It is simply a strip of stitched up elastic. You need:

  • twice the height of the book you are covering of 5 cm/2″ elastic, plus 11cm/4.5″ extra elastic *
  • scissors
  • pins
  • sewing machine

* I only add a little bit extra overlap as the holder needs to be tight, so that when you sew it together the loop will be snug and firm around the journal.

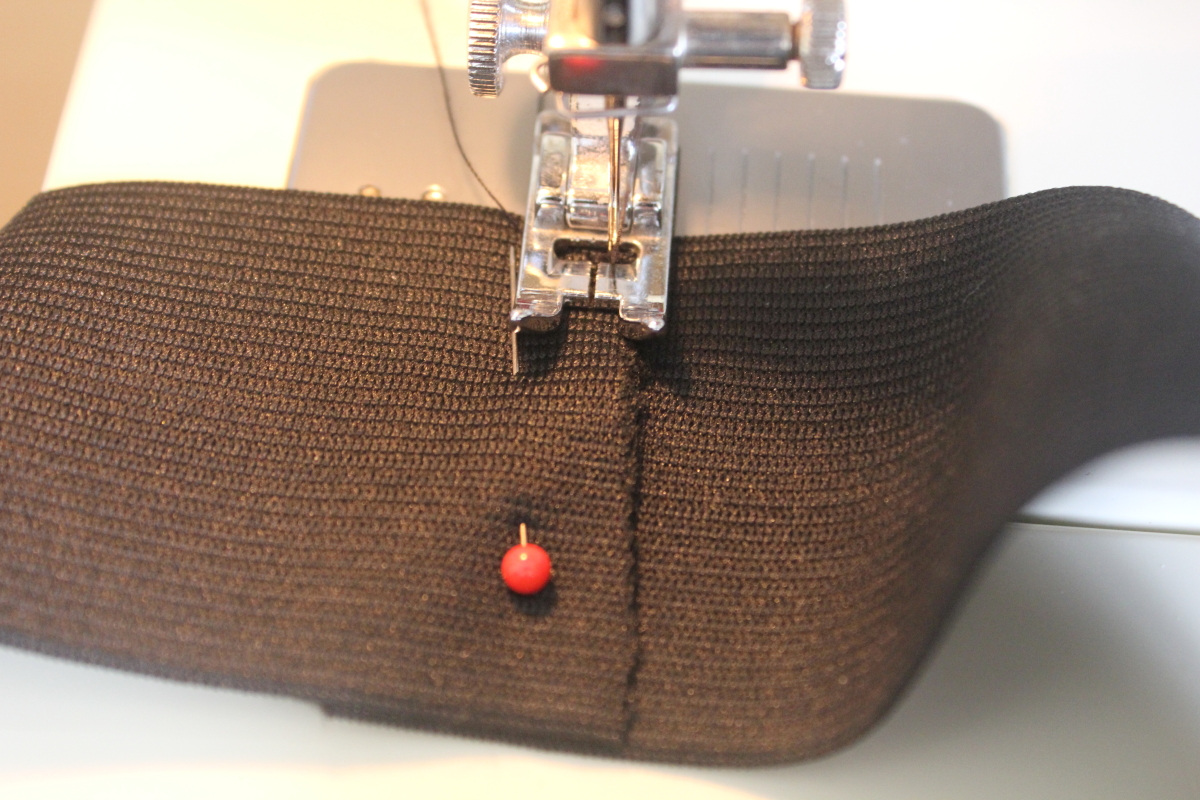
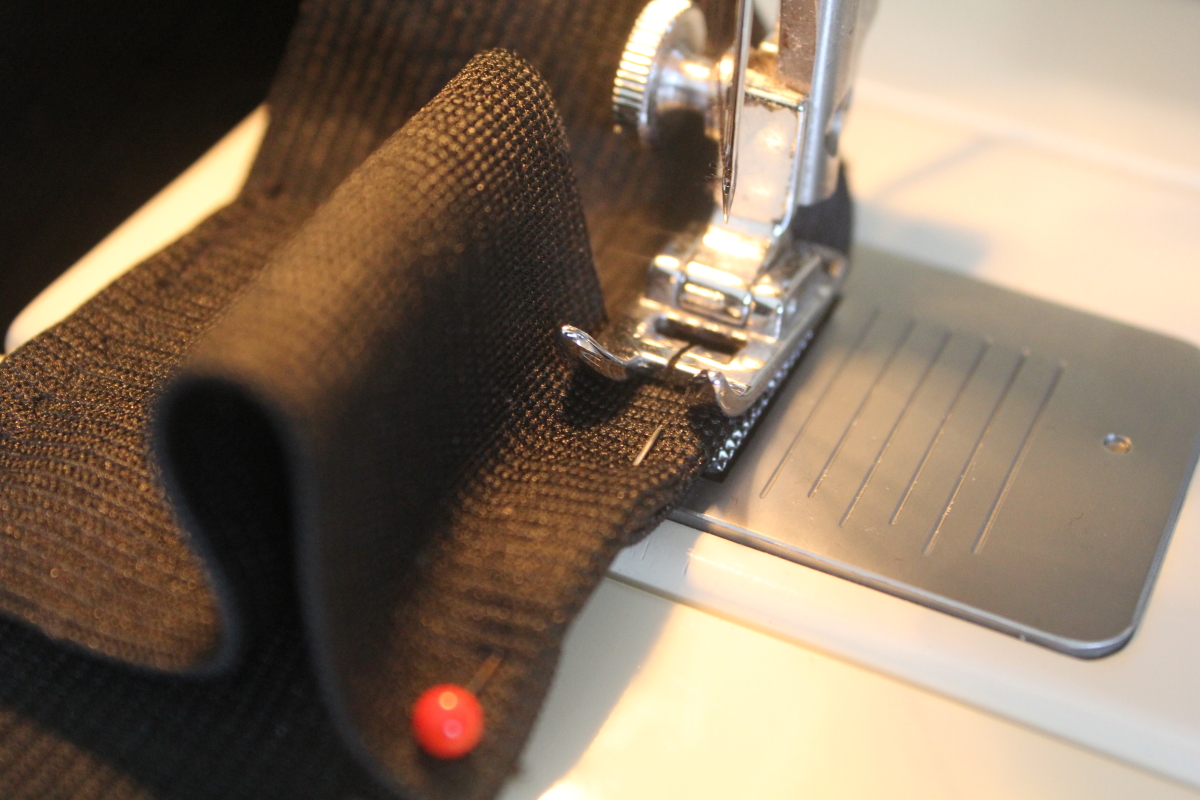
Overlap and pin. Machine stitch.

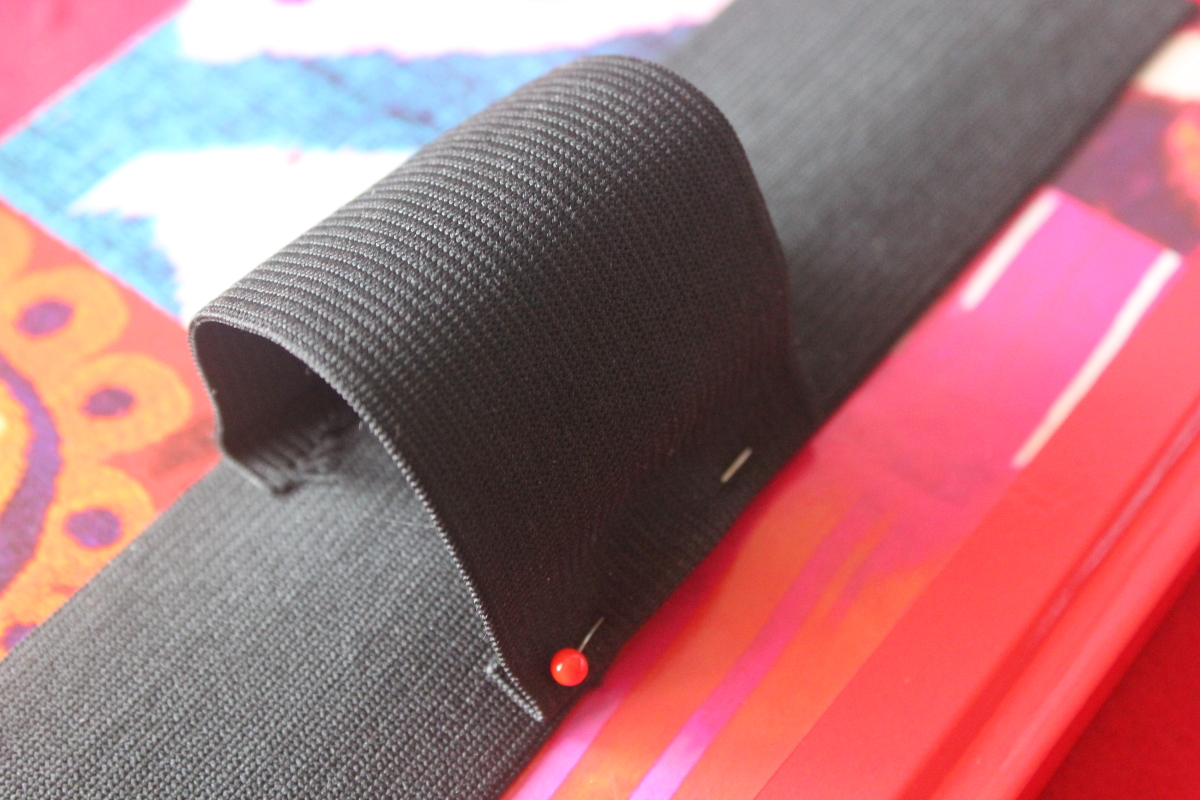
Take the extra piece of elastic and working over the join in the elastic, fold the ends as illustrated, pin down and machine stitch.

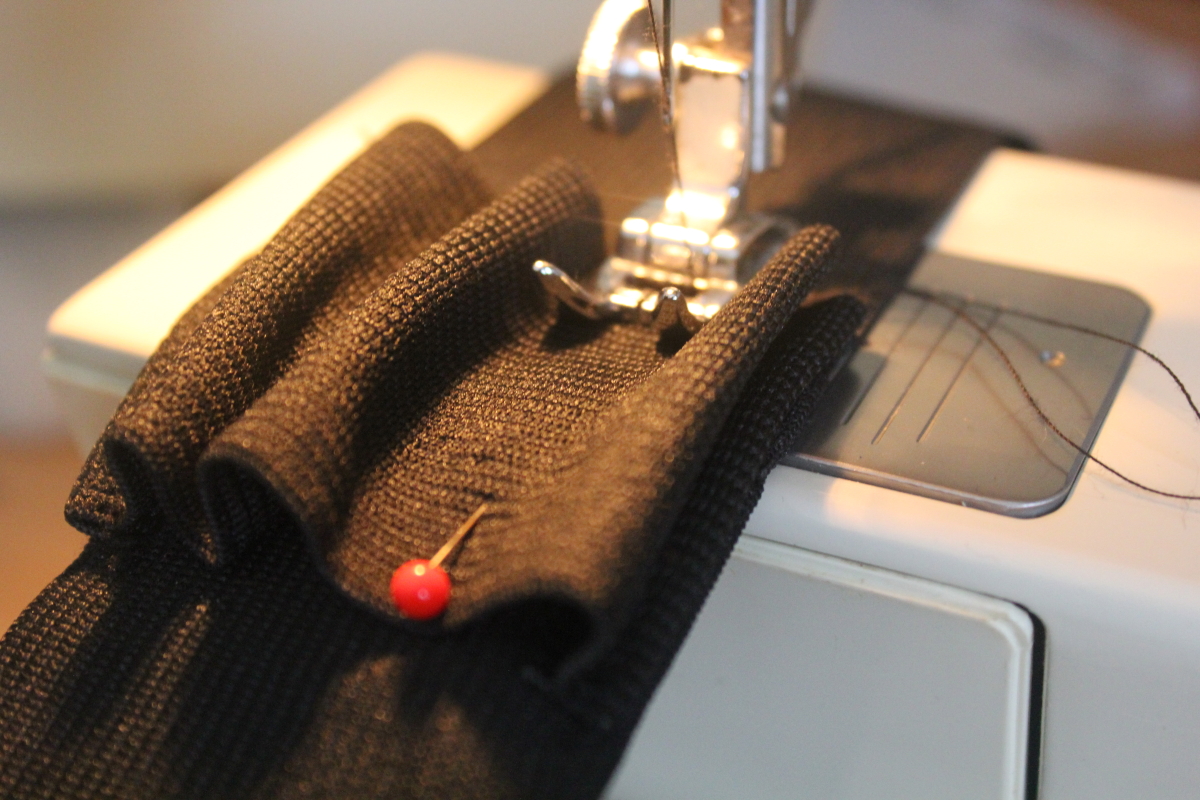
Divide the piece into three even sections and pin down, then sew. I have sewn two channels between each section in the past but now I just use zigzag stitch and it works well.

I used to make one section wider than the others but three even sized sections are actually more useful.

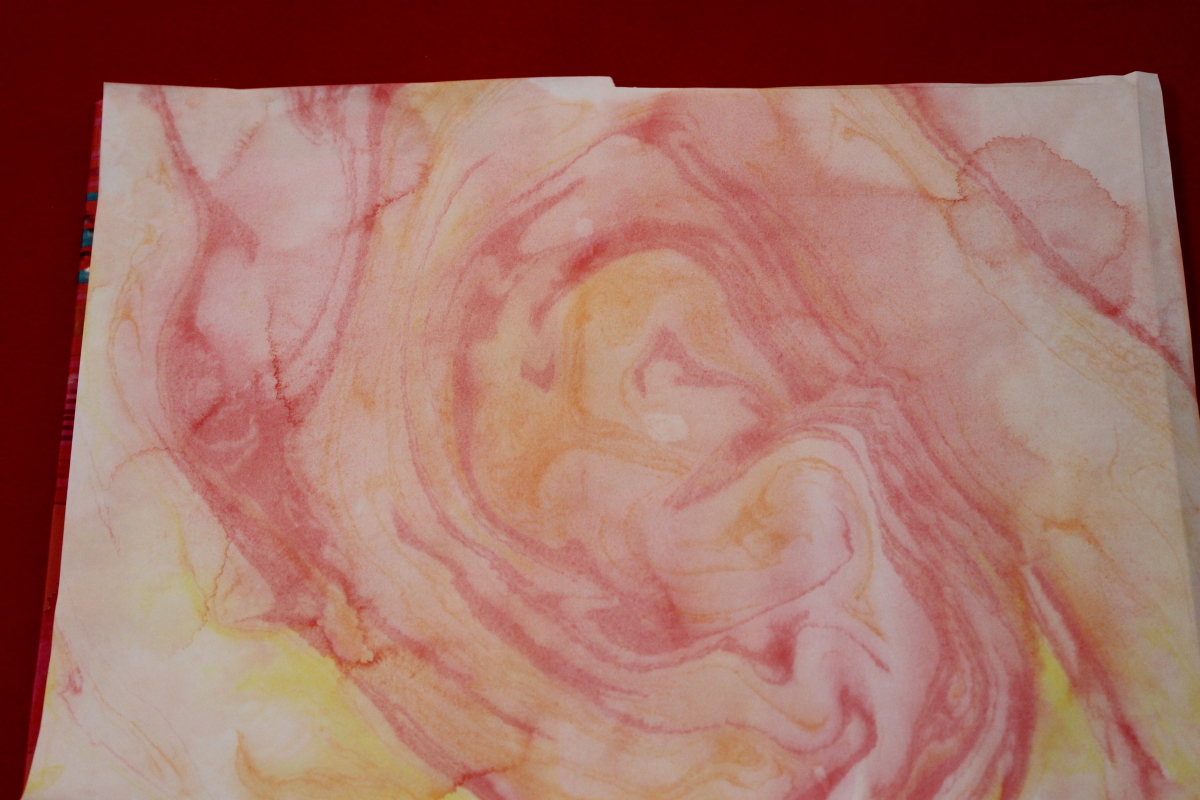
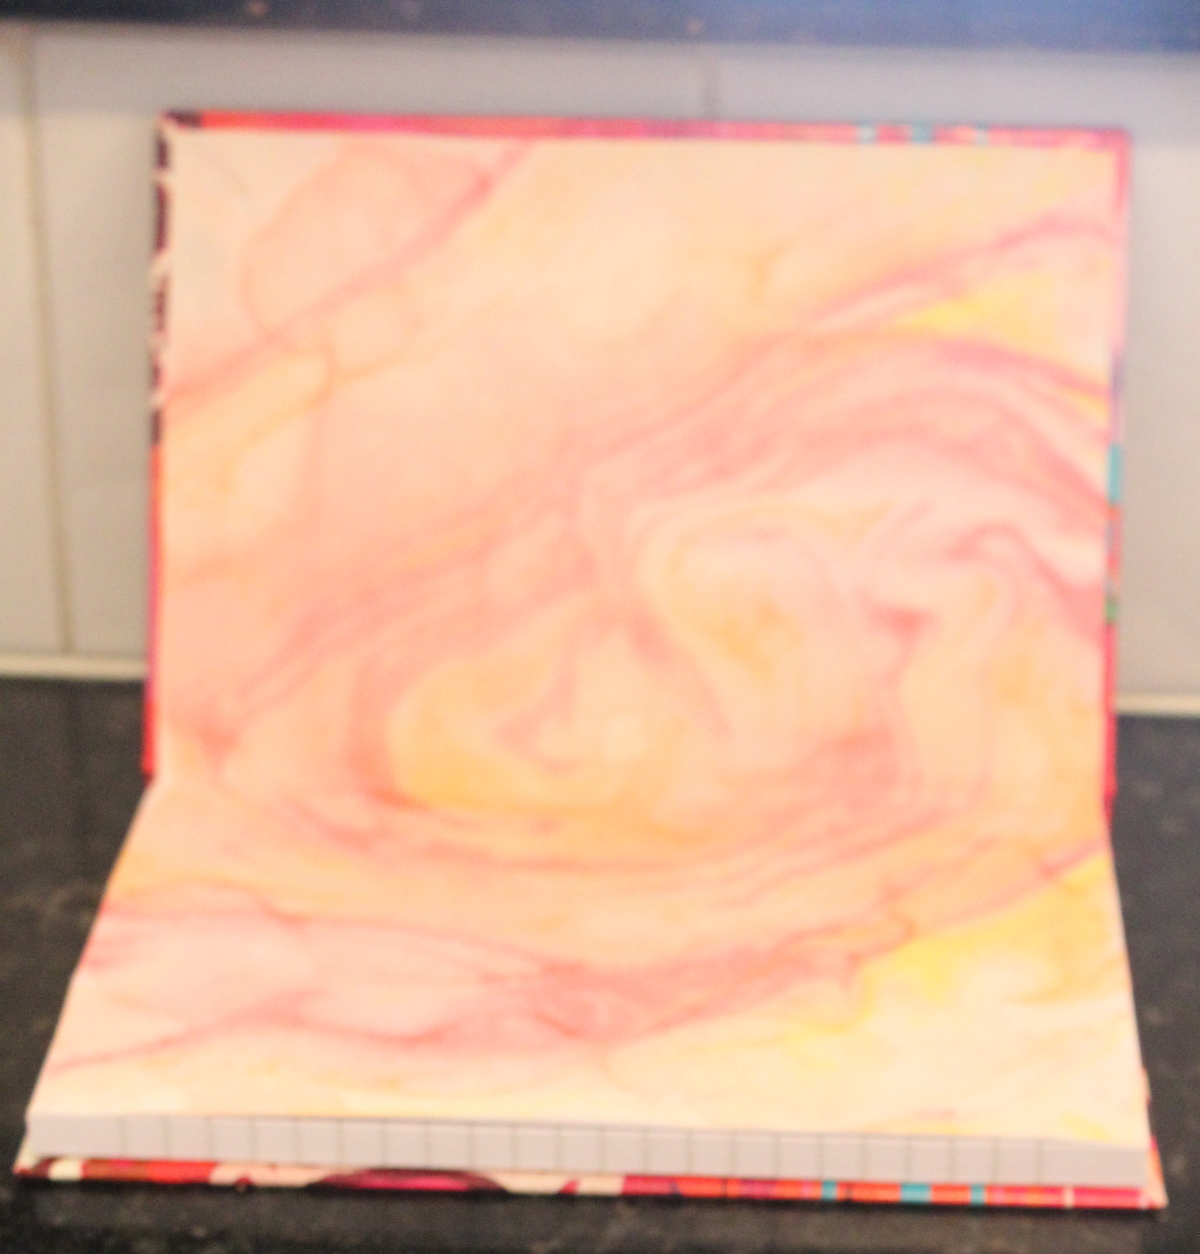
The finished product. These covered journals make popular gifts, especially if covered in paper to match a pregnancy, a journey, even setting up a blog.

I use my journal every day and include a calendar in the back where I can mark times we’ll be away, when we have house guests and school terms for Western Australia.

Did you know yesterday was Play in the Sand Day? Here it would be Play in the Puddle Day as we’ve had more rain than we’ve had for years! The garden is happy, but the weeds are happier.

Share this post
Share

How To Marble With Water-based Inks

Share this post
Share

Marbling is a method of decorating paper by floating water-based inks on water, swirling the inks, pressing on the paper and removing it to dry. Traditionally oil based paints were used but I prefer prints which are easy to fold and glue, not rigid and thick like oil based prints.

I use marbled paper for the frontpiece and backpiece of my journals. I use Japanese water-based inks from an art supply shop and  printer paper. I used to use litho paper but prefer printer paper now.

Collect your materials:

  • water-based inks
  • a stirrer
  • rubber gloves
  • paper to fit your journal (I use sheets of A4 printer paper)
  • an appropriate sized sink/bowl of water

Drizzle inks onto the water and stir. I select colours to suit the paper used to cover the journal. You can created a darker pattern by increasing the intensity of the ink.

Smooth the paper over the ink making sure the paper surface is completely touching the water. Print two in similar colours for the front and back.

Remove and lay flat to dry. Usually I leave them outside where the prints dry very quickly but it’s raining today. This print looks streaky as it took a long time to photograph.

The paper needs trimming to fit the pages so I lay it out where it fits on the cover and the press the printed paper over the page edge creating a fold to show where to cut. You can see the fold to the right of the image.


Using the gluestick, put glue all over the surface to be covered and starting from the fold in the middle smooth down the marbled paper until it is flat and smooth. That’s the frontpiece done, now do the back!

Next week I’ll show you how to make the elastic holder which keeps everything I need on the journal, ready to go.

Today is Assistance Dog Day. There are many kinds of assistance  dogs: guide dogs, hearing alert dogs, seizure alert dogs and other medical alert dogs. Very clever dogs.

Share this post
Share

Making Furniture

Share this post
Share

A new birdcage but nowhere to put it. Tried several places, on shelves, on a cupboard and on a bench and nothing looked quite right. Decided to measure up and make my own display unit.

Did some measurements and sketched a plan. Took the plan to Bunnings, an Australia wide hardware store. Bought the planks and took them to the Chop Shop in the back of the store where Brad cut them to size.

Painted the pieces in Dulux Antique USA.

After the second coat of paint our son drilled and screwed the unit together. My husband held the pieces in place. He counter-sank the screw holes, I filled them and later, sanded and retouched the paint.

Very pleased with this new piece of furniture.

It’s International Iris Day today. Mine are looking good, but it’s too soon for them to flower


Leave a comment

Share this post
Share

Birdcage Cushion

Share this post
Share

Couldn’t resist the birdcage image!

Washed and ironed the linen cushion cover and then pinned on the pompom edging.

Machine stitched the pompoms on, using a large zigzag stitch. Hand stitched zippered edge which was hard as I have a sore finger. The pompom edging stretches a little bit.

The finished cushion.

Couple of pompoms left over, so I cut them from the edging. I made the tassel from embroidery thread looped five times. After I stitched one end together and snipped straight across the other end, I stitched the pompoms together on to the top of the tassel. Added a wooden bead to cover the stitching and some others for decoration then attached it to the laminated bookmark. The lovely floral bookmark is from Yas Imamura’s Quill & Fox.

Yesterday was International Firefighters Day.


Leave a comment

Share this post
Share

Summer Salads and Dressing for Retirement

Share this post
Share

Salad1
Roasted kumara, beetroot with beans, dressing and toasted pine nuts.
Salad2
A garden salad with a vinaigrette dressing.
Cannas
Too hot for too long to have many flowers to choose from in the garden, so cobbled together cannas, carnations, alstroemerias and one Father’s Love rosebud.
Fitness
For years I’ve had a well established work wardrobe but now I’m semi-retired I’m not sure what to wear at home. I’d like clothes suitable for gardening, housekeeping and craft activities. I want to look reasonable if people drop in, I’d like wash and wear but can only come up with athletic gear! Not sure I’m quite the right shape for all over Lycra! Any ideas?

Hope you enjoyed Plant a Flower Day yesterday wherever you are in the world!

Leave a comment

Share this post
Share
Share