Draught Stopper

Share this post
Share

How do you keep the cold out in winter? After six months of high temperatures and no rain, Western Australia’s southern areas are making up for lost time! Very cold nights and a lot of rain. It feels like the winters we had as kids. Cold nights, frost on the grass then warming sunshine around mid-morning then more rain. It’s an old fashioned winter.

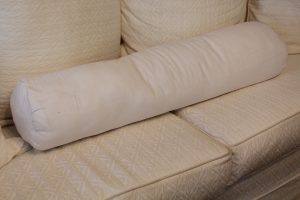
Our house is pretty draught free, except the door in from the garage rattles in the wind. When I tackled a low shelf in the laundry, untouched since we unpacked our things out of storage, nearly fifteen years ago, I found a thick mattress topper and a polyester filled pillow. No idea where they were used before but I immediately knew how I could used both items. I’d make a draught stopper to put against the garage door. Last year I used a bolster off an upstairs settee, time for a purpose built, recycled material draught stopper. Draught stoppers are also called draft excluders and door snakes.

Folded the topper in half longitudinally and rolled it up after I’d teased the polyester out of the pillow and placed that in the middle. Nice fat sausage. Stitched it up. Knew I had a metre or so of red velvet. Measured out how much I needed and cut. The next drama was finding a zip as long as the sausage.

Off to the fabric shop. A lovely assistant asked me what length I was looking when I was standing in front of the zipper display. I explained the length I needed and she told me zips are not available in that length. She then took a roll to the cutting table and showed me a continuous zipper. Never seen one before. She showed me how they work and cut off the length I needed. Worked like a dream!

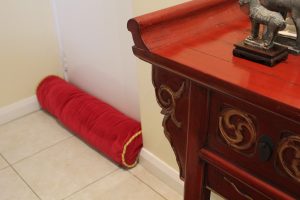
Once I’d stitched in the zipper I cut two end pieces using a bread and butter plate as a template. I had some pretty pink piping which I thought would look good at each end but when I was looking at the door where the stopper will be, I realised it is very close to a Burmese red altar table with all the carved details highlighted in gold.

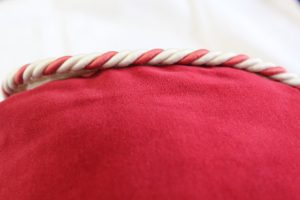
Originally thought I’d use this pretty pink and white piping but realised the light gold and dark gold piping would work beautifully next to the Burmese Red and gold altar table.

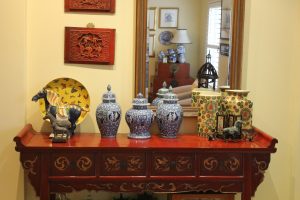
Burmese red Chinese altar table.

I had used a gold and cream piping on two tapestry cushions I’d made some years ago. Found the piping and there was  just enough! Next challenge was working out how to join the ends. Thank goodness for YouTube. Bit of a faff, but I couldn’t remember how I’d done it before and watching how it was done professionally set me on the right track.

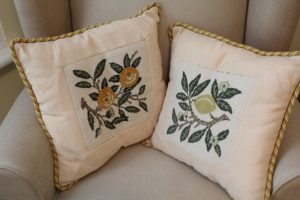
Used some leftover piping from these tapestry decorated cushions I made many years ago.

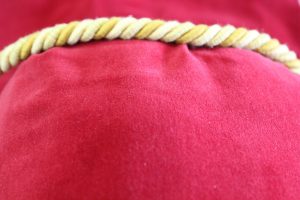
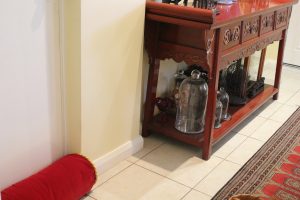
Not confident to just machine sew both layers of velvet and the piping I pinned then hand tacked it. Much easier to accurately machine sew the two layers of velvet and the piping. Pleased with how it looks. Now in position against the door. Stopped the draught, looks good next to the red altar table.

I have made many draught stoppers, door sausages, whatever you call them. I made four for my Mother who always felt cold and thought the sliding doors let in cold air. I made some for my son. I have made bolsters for our bed and for an upstairs settee. I haven’t ever made them with piping/cording. I wont be doing it again, either, anytime soon. It was fiddly and took ages to get just right. Of course, now it is finished I am pleased with it!
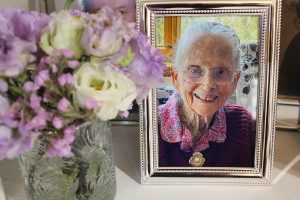
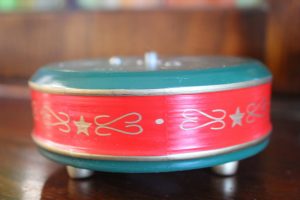


Share this post
Share

Olive Oil, Mother’s Day and Recycling Beads

Share this post
Share

extra virgin olive oil

Having trouble sourcing your favourite extra virgin olive oil?            Australian olive oil is in short supply due to the poor fruit harvest in 2023. Outside the Mediterranean, Australia is the greatest consumer of olive oil in the World. Each Australian consumes 2.1 litres of olive oil every year.

Free Olives Olivenast photo and picture

Image Pixabay

This doesn’t surprise me as I slosh, drip and drizzle EVOO on things I cook every day. I buy 3 litre ( 101.4 oz) tins and decant them into a one litre dark glass bottle kept within easy reach of the hotplates and food preparation area. The bottle has a pop up pourer, so no mess. Buying in bulk and decanting is more economical than buying small bottles. Storing in a dark glass bottle protects its purity.

Apparently, in Europe, the price of olive oil in January 2024 was 50% higher than January 2023. This jump in price is due to olive oil producing nations experiencing longer and hotter summers resulting in poor harvests. Some sources also mention the increased interest in the Mediterranean diet which promotes olive oil, adding greater demand in an already diminished supply chain.

mother’s day

I hope all the Mother’s had a lovely day with their families celebrating Mother’s Day. Or doing something else if that’s what they wanted! We didn’t celebrate Mother’s Day this year because I’m too sad. My Mother died in March. In memory of her I bought bunches of flowers in her favourite colours, so lilac, purple, cream, white with a dash of red. I also put a little arrangement of lilac and white lissianthus next to her photo. I miss her!

Mother’s Day Sunday was also the day we celebrated our 40th Wedding Anniversary. Forty years! On the Friday before we went to a restaurant on the beach and ate fish tacos, a crayfish taco and Fremantle octopus tentacles, plus roasted butternut and chips. Beautifully presented and delicious. Rain and stormy conditions were forecast but in reality there was a clear blue sky and a bright blue ocean and we were hot. A lovely way to celebrate.

Dessert of burnt honey cream brûlée with pear sorbet plus an extra scoop of pear sorbet because my husband knew I’d want to taste the sorbet even though I declined dessert.  Soon it’s pear season so I’ll try making pear sorbet. It was very good.

jewellery

Last week I did a jewellery recycling workshop. Our instructor had bundles of old bits and pieces to be remade into something we’d use. I made a necklace with a ring in it to hang my reading glasses from so I knew where they were. Great idea but it was so long and so heavy it knocked things over or off the bench. Put it away to consider at a later date as the beads are very pretty.

Meanwhile, I gathered all my necklaces secured not by jewellery catches, but with safety pins. When the catches broke, as they always did, I’d secure both ends together with a small pin. As a junior primary teacher, I always had safety pins, bandaids and tissues in my bag. Today I mended every broken necklace catch. Really pleased with my fully fixed collection. Plus I’ve used some very bright beads from old necklaces to made new, less bold necklaces, more suited to my current lifestyle.

Sorting and fixing my necklaces made me realise I have a lot of jewellery I don’t use anymore. I don’t have pierced ears but had a lot of clip on earrings but I don’t wear them now. I have some pretty bracelets, too, along with a pile of necklaces. Some of the sweetest bracelets were made by children I’ve taught. I’m keeping them! Happy memories. The rest are in a bag, ready to go to the Salvation Army along with three other bags of things I’ve sorted. I quite like going into the city to drop things at their depot as I then go across the road to an Asian supermarket, buy the best fish balls and speak appalling Mandarin/Putonghua to the checkout girl. She is so polite about my accent!

Share this post
Share

Cooking, Author Talk and Reworking Jewellery

Share this post
Share

 cooking

Are you trying not to throw away fresh food? Me too. Recently when I opened a packet of chicken breasts I wondered if they were actually turkey breasts or maybe emu! I eyed off the enormous chicken breasts for a while then decided that rather than cut them in half as the recipe directed, I needed to cut each into about six pieces. I’d chosen the recipe because I needed to use some baby romano tomatoes, baby spinach and the chicken. Plus I had everything else listed. I got to use up lots of ingredients already in the fridge.

I had to adjust the quantities of the ingredients to accommodate all the chicken! So I had to make it in two frying pans. Luckily we like chicken. We will be eating  Tomato, Spinach, White Wine Chicken for quite a while.  I’ve served this chicken dish with mashed potato  and will also serve it with spicy rice, then couscous. The author also suggests thick noodles. Recipe (here)

At the same time I baked a loaf of sourdough. Due the heat in Western Australia, the starter was very energetic! I thought the loaf was going to bubble over the edges of the baking tin, but it didn’t and it tasted great!

Sourdough with caraway seeds. Delicious.

When rain was forecast for Sunday I decided to cook a traditional roast lunch. Our son was here for the weekend and we like to sit at the table and talk. I had to sort out so much stuff on the table, it had become a sort of dumping ground.

Sunday morning arrived bright and sunny and 21ºC. No rain in sight. Put the meat to roast, prepared the vegetables and opened the French doors so we could hear the fountain. Faux rain. Lunch was long and lovely, plus there was leftovers for a light dinner and cold roast beef and pickle sandwiches the next day.

Apple crumble and icecream with a sprinkle of cinnamon.

author talk

A while ago I wrote a review about a book I’d read by Rachel Johns called, ‘The Other Bridget’  a joke on Helen Fielding’s book ‘Bridget Jones Diary.’ Although written to appeal to a younger reader, I suspect, I really enjoyed it. The plot was clever with lots of twists and turns and it was written about an area I know well. I read a lot and it’s not often novels are set in Fremantle, Western Australia.

We were going away for a break so I borrowed two more books by the same author. Again I enjoyed the local settings and the clever story line. So when the Fremantle Library advertised an author talk with the author, Rachel Johns, I responded immediately and got a ticket. I am so glad I did, too.

Glancing around the room it became apparent those women attending were aged from their twenties through to about 70. Johns’ presentation and following open discussion with the audience was just like the books, that is, fast, funny and full of current affairs. So entertaining.


Some of the bright, chunky beads I wanted to reuse.

I  had also enrolled in a course run earlier that day called UNIQUE JEWELLERY. When I was working as a junior primary teacher I always wore bright, chunky  necklaces as the children liked them so much. Not really suitable for the life I live now, so I wanted to convert some of them to be more toned down. I also needed to mend some of the clasps and just work out what I could retrieve from my colourful collection.

I made a necklace with a ring for my glasses as I lose them all the time! I was inspired by the necklace the tutor was wearing with her glasses hooked on it. I think I could just wear it as a necklace, too.  I also had time to repair the clasps on some necklaces. Later, I took apart some pieces to make new, less colourful necklace. I have bought a kit to renew more clasps and to make new necklaces.

Reusing beads to make a new necklace. Satisfying project.

P.S. There’s a problem with the necklace I made to hold my glasses; it is too long and heavy and crashes into the bench top and whatever I’m working on and is annoying. I’ll probably take it apart and make a new necklace. So, still misplacing my glasses, so I’ve bought a few extra pairs to limit the time spent hunting for reading glasses.


Share this post
Share

Making, Cooking and Growing

Share this post
Share

making

Some time ago I made covers for some of the tissue boxes around the house. I made the covers from delivery boxes (here) then covered them to suit the area where they would be placed. The tissue box in the kitchen is in constant use and was showing a lot of grubby marks! The stains could not be removed using a wet cloth so time to recover.

The original cover was black and white zebra print paper. I was unable to remove the unidentified stains.

The black and white pattern suited where the tissues sit so I stayed with the black and white theme. I had to cover one side and the top, then the second side as I wanted the print to be the right way up. Then I cut two rectangles for either end.

I cut a cross into the piece covering the oval hole in the top. Then I trimmed it and snipped the little edges. Glued each one pressing the edge to create a perfect oval shape.

The previous zebra print cover had been sealed with Mod Podge but this certainly didn’t prevent staining. This time I used diluted PVA glue applied with a foam brush. Time will tell how effective that has been.

I chose black and white gift wrap for the new cover as this fits well with the other items nearby and I already had it. It is an Emma Bridgewater design called Black Toast. I have collected a lot of crockery in this design over the years and am making a point of using it regularly.

cooking

Poached Eggs  Arriving back in Perth late in the evening after a few days visiting my Mother more than two hours away I looked in the fridge. I was hoping for something quick and easy for dinner but no such luck. Decided poached eggs on toast would have to do this time. This is how I poach eggs. Take two large mugs and half fill them with boiling water from the kettle. Add a splash of vinegar. Gently crack an egg into each mug then microwave on full for 90 seconds. Meanwhile, make two pieces of toast. (I spread pesto on mine!) Place the toast on a plate and gently remove the cooked eggs from the mugs using a slotted spoon. Slide onto the toast. Grind of pepper and some salt. A couple of tomatoes from the garden. Delicious.

Sourdough Bread. Articles about sourdough bread always show gorgeous rustic boules, but I like fairly regular slices. For years I have baked my bread in a parchment lined, rectangular glass Pyrex dish. Then I bought a double walled metal bread baking tin. Cooked at the usual temperature and for the same time, the loaf from the tin was more golden all over and beautifully cooked. So now I will use the tin to cook my bread.

KNIVES I have a rack of kitchen knives and like to keep them very sharp. One of my jobs was to soak the whet stone and then sharpen and wash the knives.  Also bought a new bread knife but it has been a huge disappointment so I’m back using the semi-blunt one. Seeking a new knife. Any recommendations?

growing

I regularly apply Epsom Salts (magnesium sulphate) to my gardenia bushes. They are healthy and well established. They are covered in blooms twice a year. I mention their health and generous blooms because I just read on the packet the Epsom Salt came in that it should be diluted in 4 litres of water then poured around the base of the bushes. For about thirteen years I have scattered the salt around stems, then watered them, so not the recommended way to use Epsom Salts but no damage so far!

Other uses listed on the packet include relieving sore or tired muscles, soothe aching joints, fabric softener and general plant nutrient. For tomatoes, citrus and lettuce the recommended dose is 25 tablespoons of salt dissolved in 4 litres of water then sprayed on the plants when it is cool. If you’re applying Epsom Salt to remedy magnesium deficiency in the soil, dissolve 2 tablespoons in 4 litres of water. Make sure the salt is dissolved. Magnesium Sulphate is also used in flotation tanks instead of sodium chloride.

The gardenias have thrived on wrongly applied Epsom Salt.

A quick review of the common uses of Epsom Salt just before I posted revealed many more uses, such as  a warm bath with added Epsom Salts just before bed aids sleep, it reduces the swelling of sprains and bruises and helps reduce swollen feet and draw out splinters. The list continues with using diluted ES to treat insect bites and bee stings and spray it on sunburn. Interestingly, 1 tablespoon of ES diluted in 1 litre of water poured around the base of tomato bushes results in more fruit. Have I missed anything?

Regular readers know I am growing a tomato forest. These mid-sized fruit taste so good and we often eat them before they get inside. For years I read about people who weigh every tomato and calculate their harvest at the end of the season but I’m just keeping a tally of how many tomatoes we pick.


Share this post
Share

Post Christmas Occupations

Share this post
Share

post christmas

The longest ever Christmas celebrations end today. Family parties, here and at my Mother’s, Christmas lunch with wonderful friends, a Boxing Day party with our lovely neighbours and some visiting in between. Enormous amounts of food prepared and eaten, thoughtful gifts and treats shared and slowly things are returning to normal. The fridge wouldn’t agree, but we’re working on it!

Our son had ordered a large ham and a turkey roast from his butcher then found he had to go away for a fortnight, only flying back late Christmas night.  I’d cooked a smaller ham and turkey breast already, plus all the usual trays of star biscuits and shortbread to share and then the ham and chicken breast rolls he’d brought.  So food, food, every where food, or so it seems.

The second ham, almost ready to go into the oven.

Christmas also brought each of us a haul of books, our favourite sort of present. My Christmas stocking included two luxe magazine as well (goodie). So, eating mostly out of the fridge and reading in between socialising and gardening. It has been dreadfully hot and the now rather large tomatoes need regular watering and staking.

When I planted the tomatoes in these troughs I thought I’d be able to protect them from the river rats by putting the cover over the frame but the tomatoes are way too big now.

marbling

Even as a child I really liked the marbled pages lining the front and back pages of books. They’re called endpapers. I especially liked the marbled lining papers in the family atlas despite the evidence of silverfish activity. Years ago I did some  marbling using enameled paints but the paint was  slow to dry, messy and awkward to clean up afterwards.

A newly covered journal with a marbled back end paper.

Then I discovered Japanese inks.  The Japanese traditionally used calligraphy inks for marbling, but modern inks are easy to obtain and use. The Japanese embrace the concept of things not being perfect or unpredictable outcomes and developed techniques of floating the ink, or ‘suminagashi’ which involves dropping the inks on water. The inks naturally disperse but can also be manipulated by blowing on the water’s surface.

Recently I was reading about a professional marbler in the UK, Nat Maks. (natmaks.com   Her works on her site are beautiful!) She marbles on sheets of paper 3m in length. These sheets  are used as wall hangings and wall art. She has designed and had a 3m x 1.5m bath built to print these large sheets. Inspired by her beautiful papers, I assembled  Japanese inks, gloves and paper.


I have always marbled on recycled A4 paper but this time I decided to print  on some lithograph paper I found when I tidied the laundry cupboards. Bought when I was designing this house and doing lots of plans and drawings for the draughtsman, the large, once flat sheets had been rolled, then at some later date, squashed on a shelf in the laundry. I cut the paper to the size needed to line the front and back pages of my journals, then ironed the rectangles as the paper wasn’t flat. I experimented inking the rough and smooth sides of the paper and settled on printing the smooth side.  I really like the soft, gentle colours created.

Don’t normally iron paper before I print but I cut these rectangles from large sheets of lithograph paper which had been squashed in a cupboard.

While I was ironing I gathered all the grosgrain ribbons I use year after year on our gifts. I really like large, generous bows. I bought a 50 metre spool of this ribbon years ago and recycled ever since it.

While the sheets were drying I covered some new journals. I have bought these black books with a red spine for more than 20 years but they are getting harder to find. I write every day. Sometimes I draw, too, or glue in photos or tickets or other ephemera from our travels. I list daily and long term TO DO lists and enjoy ticking jobs off as they are done. After I’d covered the journals I glued the marbled papers as front and back covers.  Added a calendar. That’s my journals sorted for about a year!

I trim then smooth the photocopied images front and back, fold them in, glue then down then cover the end pages with a sheet of marbled paper.

       VERY BEST WISHES FOR A

            HAPPY and HEALTHY

                        NEW YEAR!

Share this post
Share

It’s December!

Share this post
Share

And just like that, it’s the first of December and I’m not really ready!

Luckily, I began soaking the fruit for the two Christmas cakes we make each year ages ago, so when the opportunity arose to mix and cook the cakes, I was ready. Ably assisted by my husband, both cakes were in the oven and the kitchen was cleaned within two hours. Smells very good.

Every so often I’m tempted by a Christmas Cake recipe described as ‘fabulous’,’ quick’, ‘ready in no time’ and we’re always disappointed. The recipe I use came from my Aunt via my Mother and the photocopy is stained and showing signs of being folded year after year. It is still the best cake! The list of ingredients is long and converted from Imperial to metric measurements. I assemble everything on the kitchen bench before I begin, streamlining the actual mixing time. Who doesn’t enjoy the distinct aromas of  cinnamon, ginger, cloves, nutmeg, a splash of almond essence and vanilla? And the mixed dried fruit has been soaking in port for about two months and smells pretty good, too.

So, I line the tins with brown paper, then parchment paper, holding the layers in place with pegs! It works. I remove them before the cake tins are really full. Once the cakes are cooked, which takes about four hours, they’re left to cool in the tins in the oven. Some days later, my husband begins dosing them with the port drained from the mixed fruit and kept in a jar. Using a skewer, he pokes the cakes then drizzles them with the port. These are rich and beautifully moist cakes by the time we start eating them!

Ready for the oven. I simply decorate the top of the cakes with cherries and almonds. I am the only one who likes the traditional layer of marzipan and icing, so I don’t bother anymore.

CRAFT

My other Christmas occupation has always been craft. Inspired by a lovely gift from a friend, I have made air dried hearts. My dear friend gave us the blue and white porcelain heart when our adored dog Louis left us suddenly on the 9th of March.

I rolled the air dry clay on a bread board and used a cookie cutter to cut the heart shapes. Previously, I’d made holes in ornaments I intend to hang using a straw. No plastic straws in this house anymore! Resorted to the sharp end of a temperature probe. Not perfect.

Left the hearts to dry for a few days, turning them regularly. I think I should have made them thicker as these needed flattening as they curled a little on the edges.

The process is similar to covering the baubles. ( here) Using the same 3 ply patterned paper napkins/serviettes, I separated the layers. I glued the blue and white patterned paper onto the now dry hearts. I used a UHU glue stick. ( I use a lot of this glue on all sorts of projects, so I look for the multiple packs on sale before school goes back. Buying three at a time can be very economical!)

Needed small, very sharp scissors to trim the paper in line with the edges. Then I realised it was far easier to trim the overhanging paper, leaving enough to glue onto the sides. Quicker, easier. Then I poked the hole through the paper napkin layer and added a ribbon to hang the hearts or tie them to gifts. I’ll be making more of these!

This flurry of activity has been prompted not only by Christmas approaching but also because I had my second eye surgery last week. I had very poor eyesight, now I am really pleased by my restored vision. It is life changing. I will start driving again this week, I can read easily without holding the text right up to my eye, watching the television is amazing and I can see faces.

The first surgery was perfect, the second not so easy. By the time I was discharged from hospital my eye was really uncomfortable. Eventually needed pain relief, at which point we discovered we had an almost empty packet of Panadol. Had no impact at all. Another search revealed some codeine. Slight reduction of pain but the codeine did let me sleep for a few hours. It was an extremely long, painful night. Saw the surgeon early the next morning and he told me the cornea had been injured. Anaesthetic eye drops helped but I was also sent off to get better pain relief. We’ll be  prepared in future for treating any sort of pain with a supply of effective pain relief.

Eight days later, my right eye is still extremely bloodshot, with occasional pain, but remarkable vision, too. I wander around, looking at the house, at the garden, just taking everything in. Really photophobic, so only going  outside without sunglasses in the evening, but it’s early days. I feel very lucky.


Share this post
Share

Jacarandas, Tomatoes and Some Other things

Share this post
Share

JACARANDAS

Years ago when I began teaching at a new school, the Principal was showing me around. Near the decking outside my new classroom was a magnificent jacaranda tree. The tree was totally covered in flowers as was the deck under it. I admired the tree, saying it was beautiful. I was told most crisply that I wouldn’t feel that way if I had to clean up under it!

Y

I still really like jacaranda trees. There are many around here, but to really enjoy them en masse we go for a drive to Applecross, Ardross and Attadale over the other side of the river. So many mature jacarandas in full bloom. Some of them are very old as my Mother went to school in this area and she remembers planting some of them on Arbor Day as a small child. She is now 92. So pretty.

The jacaranda is not native to Australia but comes from South America.

tomatoes

Nothing tastes as good as freshly picked, home grown tomatoes. I’ve had great crops over the years, but more recently I’ve had to share the bounty with the river rats. In an attempt to enjoy our fair share I have all sorts of cages and protective frames to keep the tomatoes safe.

My Mother’s tiny tomatoes taste wonderful. She kept me some which I brought back and squashed onto a piece of paper towel, spreading the seeds. Left them to dry out until it was time to plant. Cut the sheet of paper towel into six pieces and buried a square in each pot, covered them with potting mix and watered regularly.

Seedlings germinated in five of the six pots. What happened in the sixth pot? I have no idea! When the seedlings developed four leaves I transplanted them, mostly two in a pot, leaving a week between re-potting each lot of seedlings. I put two in each pot following the advice of a local gardening broadcaster who suggests pulling out the less vigorous seedling later. I can never do this, so end up with so many plants.

Soon I will plant some of the seedlings in their final beds, covered in protective cages, and share the others around. While I’m eagerly awaiting my own crop of tomatoes, I have bought some to try dehydrating them to mimic sun dried tomatoes. Using my son’s dehydrator, I sliced a couple of kilos of washed tomatoes and arranged them on the shelves of the dehydrator, turned it on to the recommended temperature and left it alone for nearly seven hours. I did turn the slices over half way through the process.

At that stage they felt dry so I put them in two jars with a clove of garlic and extra virgin olive oil. Left them to settle for two days then tried them. Very, very good! The tomatoes taste wonderful after soaking in the oil with just the lightest hint of garlic. The tomatoes really shrank during the drying process and only filled two jars. Five days later they are nearly all gone. If I have a glut of tomatoes I will do this again as they tasted very good!

Two jars from all those tomatoes, but the taste is worth it.

My lunch the other day; Italian bread, melted sheeps’ pecorino, sun (dehydrator) dried tomatoes, basil and black pepper. Wonderful.

other things

On the topic of tomatoes, I was asked if I peeled the cucumber before I sliced it to add to the tomatoes and bread in Panzanella Salad. No, after I’ve washed the cucumber I simply run a fork the full length from one end to the other, scoring the skin. Then I halve the cucumber longways before slicing it and adding to the salad. I seem to be making this salad on repeat, but we have been buying lots of bread and I don’t like wasting food. I have a large jar of breadcrumbs already and it’s a bit hot for bread and butter pudding, but just right for Panzanella Salad.

I have just completed a long overdue tidy of the two lower shelves of one half of the laundry cupboard. Many of the things stored on these two shelves were put there the day we moved in and not touched since. Our house took longer that expected to finish, we were under pressure to leave our rental, I had just begun working at a new school and had a student who’d had a full time assistant previously but funding cuts meant no help, all compounded by the Administration being temporarily accommodated in the area outside my classroom while their original area was extended. Constant noise! So I unpacked the necessities and forgot about other things.

Amongst all the ‘treasures’ I found was this wooden base.

It was the base of a wind up Christmas decoration. Overly wound up by a visiting child, it had stopped working and I couldn’t repair it. ( Now I would probably look on YouTube) The top part was thrown out, the base kept. I’d found a candle on the same shelf. It sat nicely on the existing screw in the base. I glued a piece of ribbon at the base of the candle, then glued the faux  mistletoe and berry decoration I made a few weeks ago over the ribbon join.

Our first Christmas decoration is now on display.


Share this post
Share

Kitchen Devices and Blue and White Baubles

Share this post
Share

kitchen devices

I needed to use up some mince in the fridge. I looked up Nagi’s  Recipe Tin Eats site to see how she makes rissoles as a change from the usual way I make them. Her recipe included grated zucchini, grated carrot and grated onion. Bit off putting as I typically hand grate using either an old fashioned box grater or a grater resting over a bowl. and it takes ages. Our son, who is a keen cook and was staying with us, said, ‘Use the grating device on the processor.’

The processor is older than him and regularly makes superb shortbread dough, mixes great pastry, purees and other things requiring the normal mixing blade. He rummaged around in the appliance cupboard and  found a grating disk, the frame it sat on, the lid with a chute and a thing to poke the vegetables down the chute.  Within seconds I had a mound of finely grated carrot, zucchini and onion.

One kilo of mince and a mound of grated vegetables made a lot of rissoles. I used an icecream scoop to scoop out the mixture from the bowl to make the round shape.

Still had more zucchini so once I’d mixed the rissoles I put the whole thing  together again and grated the zucchini to make a zucchini slice. It’s fair to say this grating plate is my new interest. We will be eating lots of things with grated vegetables and cheese. The zucchini slice, a blast from the past, will also make three dinners with added vegetables.

The rissoles were cooked on the barbecue. The best part? Two more dinners of rissoles now labeled and in the freezer.

CHRISTMAS BAUBLES

English, Japanese, Korean, German and Chinese blue and white plates on a bathroom wall.

Are you a fan of blue and white Chinoiserie decorated china? I’ve always loved the various blue and white patterns and have some of my Grandmother’s very old pieces, some from my Mother and a lot I have bought for myself. When we lived in China I bought pieces made in Japan and Korea and a lot made in China. Some pieces were bought from shops, some from roadside stalls and a few pieces came from antique markets.

Many of these blue and white pieces are now around our home. Earlier this year I bought some plain white Christmas baubles intending to decorate them with blue and white patterned paper, in this case, deconstructed three ply paper napkins. We don’t put up a massive amount of Christmas decorations anymore, so I decided on a simple theme, featuring blue and white pieces.

I carefully peeled the printed sheet from the two other layers of these paper napkins. I’ve seen both three ply and two for sale locally. I cut small images from the decorated sheet and glued them to the bauble until the entire surface was covered in blue and white paper. I’ve seen other people posting about decorating Christmas baubles and they simply cut or tear the printed sheet into small pieces and glue them on. Each way seems to work well.

I think blue and white baubles will feature a lot this Christmas.

When the entire surface of the bauble was covered I hung it to dry and began another one. I bought the baubles well after Christmas and was limited to plain ones and a few with a textured surface. I was going to leave the textured ones but decided to try gluing the paper on, anyway, and it worked perfectly.

When they were dry I sealed them with a craft sealant. When I make more I will spray a glossy enamel finish on them as the first batch look a bit dull. And I will make more because it was fun and they look very pretty.

So. if you’re inspired to try this, you need some white Christmas baubles, paper napkins with colours and images you like, scissors and a glue stick or Mod  Podge and sealing spray if you’re not finishing off with Mod Podge. (I used some of the removed white paper layers to rest the drying baubles and to wipe my hands. Later I used the leftovers to clean up.)

To decorate a bauble remove the hanging attachment (the silver or gold coloured clip at the top). I couldn’t remove them from the baubles I used so I just made sure the paper sat cleanly around the base. Most commonly, people use Mod Podge to glue then seal the papers. I just used a glue stick and it worked really well. (My Mod Podge is very old and has gone thick and attempts to dilute it weren’t successful)

I cut out images from the patterned paper. It isn’t necessary but I like the  clean cut edge. You can tear the paper, too. I just glued the images onto the bauble until the entire surface was covered. I washed my gluing hand when it got sticky and kept going. Left the baubles to dry. So satisfying. When they were all dry I sealed them with craft sealer but will spray them later with gloss enamel.

Can’t stop making baubles! Off to hunt down more plain white baubles to decorate. The collection has doubled and I’ve seen more white baubles in the shops now that Christmas decorations are for sale.

Please let me know if you try this project. I’d love to see your finished product!


Share this post
Share

Free Range Eggs and Plastic Free July

Share this post
Share

FREE RANGE EGGS IN AUSTRALIA

Free Chickens on a Grassy Field Stock PhotoImage Pexels

We can buy eggs laid by caged hens or eggs laid by free range hens in Australia. According to Australian Consumer law, free range eggs are defined as eggs laid by  hens who have meaningful and regular access to the outdoor areas, are free to roam and forage and  are stocked at less than       10 000 hens per hectare. Caged hens live inside large, climate controlled sheds. The cage must be 40cm high, provide at least 550cm² per hen and 10cm feeder space. Eggs from caged hens are considered safer than free range eggs and production is higher and more efficient. Caged hens rarely get sick and live longer.

New legislation in Australia dictates that caged hens will be phased out by 2036, but each state will decide on its own timeline. Many states are already predicting 2025 as the  goal for ending caged hens. Battery hens, or caged hens, will still be legal but egg farmers will need to provide larger cages and ‘enrichment’ for the chickens.

Apparently, only 30% of eggs purchased in Australia currently come from caged hens. Both large supermarket chains in Australia have announced they will end the sale of caged eggs by 2025. ( Some research says 40% of eggs bought in Australia are from caged hens.)

Free Brown Eggs on Black Steel Basket Stock Photo 

Image Pexels

Free range eggs are more expensive than caged eggs. Nutritionally, both are very similar. Eggs are high in vitamins and minerals. We have sought out free range eggs for many years. We were concerned about the welfare of the hens. I also like the environmental aspects on chicken poo returning to the paddock as fertilizer. Free range hens are able to practice normal behaviours, such as perching, nesting and dust bathing. I try not to buy eggs from large supermarkets as they are not as fresh as eggs from other sources. By the end of 2022 our ‘other sources’, one a commercial farm with low stocking levels with daylight hours spent outdoors and another, an independent supplier, had dried up. We’re looking for alternatives.

Free Four Assorted-color Roosters Stock PhotoImage Pexels

PLASTIC FREE JULY

Free Drone Shot of Landfill Stock PhotoImage Pexels

Plastic free July was started by Rebecca Prince-Ruiz, the founder of the Plastic Free Foundation, and a small team of supporters. Begun in 2011 and since 2017, a not for profit charity, Plastic Free July encourages everyone to reduce their use of plastics. Their vision is to see a World  free of plastic waste.

Most plastics are produced from oil and gas and don’t decompose. This means plastic micro beads ( broken down plastic) can remain in landfill, soil, rivers and oceans, harming the environment and animals for centuries.

So what can we each do? There’s many checklists, ideas and helpful information online.  Try making little  changes all the time. Select the easy things to start with, such as refusing plastic wrapped items in the fruit and veggie aisle ( take you’re own fabric bags and if you forget, use a paper bag from the mushroom area), buy milk in a glass bottle (cartons are lined in plastic), store things in glass, bamboo lidded containers or glass jars, both of which are infinitely reusable.

Free Crop female putting fresh almonds from bag to glass jar placed on wooden tray with jars with macarons in light room Stock Photo 

Image Pexels

If you have room and the ability to make compost, put all your veggie and fruit scraps into the pile. I make evil smelling slime, not compost, so turn all sorts of vegetable off cuts/remains into stock, which I freeze, or turn into soup. Stock will be strained so apparently you can add onion skins and garlic skins. I haven’t tried doing this, but intend to soon. The trick is to store the remnants in a glass jar or similar in the freezer until you have collected enough to make stock. And if you’ve never made stock, inspire yourself by reading the ingredients in bought, liquid stock, packaged in a plastic lined carton.

I have bought waxed fabric wraps and also done a workshop making them from fabric and beeswax. They look very attractive but never adhered properly to my containers, so I gave up. I had to add a rubber band to keep them on the container, too much faffing around. I use shower caps collected from hotel rooms. Used, wash, hang over the tap to dry, reuse. Problem is they finally tear away from the elastic and then become landfill. So I’m trying beeswax wrappers again.

To make bees wax wrappers you need washed cotton squares, beeswax and grater, an iron and old fashioned grease proof paper. You need to iron your fabric square, grate the beeswax if you’re using it or buy beeswax pellets. I have seen pellets for sale online. This would be quicker.

I did what I have done before except I used a lot of grated beeswax as I really wanted this to work. I have accepted that I cannot make compost and today I have accepted beeswax wrappers aren’t for me, either. The wrapper I tried  just doesn’t seal tightly enough for me. Last time this happened with bought wrappers I keep them securely on with rubber bands. Wont be doing that, either, so my bees wax wrapper will go into someone else’s compost!

If you want to try beeswax wrappers there’s many YouTube and online tutorials. Good Luck!


Share this post
Share

How to Sterilise Jars, Preserving Lemons, Pickling Cucumber and Quick Soup

Share this post
Share

STERILISING JARS

Glass jars for storing food can be used and re-used multiple times. They are strong, easy to see the contents and easily cleaned and reused. Of course, they are useful for storing many other things, too, but they are perfect for food. So how do you sterilise a glass jar for food storage?

Free Person Holding White Paper Near Stainless Steel Faucet Stock Photo

Image Pexels

For each method you begin by washing the jars in hot soapy water, rinse but don’t towel dry.

1. Set the oven to 110°C, place the jars on an oven tray, place in the oven for 15 minutes, carefully remove and leave to cool.

2.Alternatively if you have a pot deep enough you can set the washed jars in it, cover with water and boil for 10 minutes. Remove carefully and leave to cool.

3. Or you could place washed jars in the microwave on high for 1 minute. Remove carefully and allow to cool.

HOW TO PRESERVE LEMONS

It’s citrus season in Western Australia and I use fresh lemons and limes in so many ways. Nearly every style of cuisine involves citrus.

I like to extend the citrus season by preserving some of the lemons. Preserved lemons are pickled in their own juice and salt for three weeks. Originating in Morocco and Middle Eastern recipes I find a little preserved lemon adds zing to everything from salads to stews. Sterilise the jar you want to use to preserve your lemons. A wide opening makes it easy to insert them. Cut off the tops and bottoms after you have washed and dried them. Then cut your lemons into quarters leaving them joined at the base. Spoon two dessert spoons of salt into the jar and spoon more salt into the first lemon. Place it in the bottom of the jar. Continue adding salted lemons, squashing them down and releasing juice.  Finally, when the jar is full of salted lemons top up with extra juice.

I push the lemons down with a round wooden ‘stick’ I’ve had forever. I don’t know what it was originally intended for but it’s great for making sauerkraut. And preserved lemons. An upended wooden spoon would do the same job.

Screw on the lid, put the jar into the fridge. Invert the jar each day for three weeks. Then, uncap and remove a quarter. Scrape off any remaining pulp, thinly slice the skin into strips and add to a salad, a stew, a tagine, anything you like.

PICKLED CUCUMBER

The Fruit and Vegetable sections are full of crisp, fresh cucumbers. It’s the coldest and wettest winter we’ve had for years, so salads don’t feature in this house. Raw, cold food doesn’t appeal at all, but the lovely cucumbers do, so I’m pickling them. I still eat them cold but only a little bit at a time.

Pickling cucumbers is easy. Sterilise wide mouthed jars. Make the pickling  liquor by putting 2:1 vinegar and water with coriander seeds and mustard seeds in a pot and bring to the boil. Then slice the cucumbers long ways into thin slices. A mandolin would be useful but I don’t have one. Do this while the pickling liquor simmers for about ten minutes. Then leave it to cool.

I added star anise to the pickling liquor because they’re so pretty! Unfortunately, my pickles don’t taste like traditional pickles, which is what I prefer. They taste good, but just not how I usually make them!

Trim the sliced cucumber to fit in your jars. Pack them in closely. When the pickling liquor has cooled pour it carefully into the jars, adding some of the spices. Put the lid on and into the fridge. These are ready to eat the next day.

When I’d filled the two jars I had about a third of a cucumber left. I try very hard not to waste food, so I diced it finely, then gathered yoghurt and garlic. I still had some cut lemons on the bench from earlier so I had lemon juice, too.

I mixed the diced cucumber, a big dollop of Greek yoghurt, a squeeze of lemon juice and some garlic to make tzatziki. Instant afternoon tea. No waste.

TOMATO SOUP

I was asked this week if I had any other suggestions for ‘quick soup’ that doesn’t require lots of chopping or other preparation. It’s good if the ingredients are already in the pantry so you can make it without going shopping. So here is my other speedy, satisfying and very easy soup!

Dice an onion and fry it with two diced cloves of garlic in a big pot. I use diced garlic out of a jar for this (2 tspn) as the juices add to the flavour and it’s all about speed and flavour. Add two cans of crushed/diced tomatoes and three cups of vegetable stock, made from bullion or homemade. Let it bubble away for about 10 minutes, blend, reheat. Serve with a sprig of basil. A little grated cheese on top is nice, too.

This Tomato Soup takes twenty minutes from gathering the ingredients to serving up, including going out the back to pick some basil. I know because I timed it. Serves four big bowls or six smaller bowls or mugs. Delicious. And economical. Let me know if you make it.

Share this post
Share
Share