Very Good Turkey Rissoles

Share this post
Share

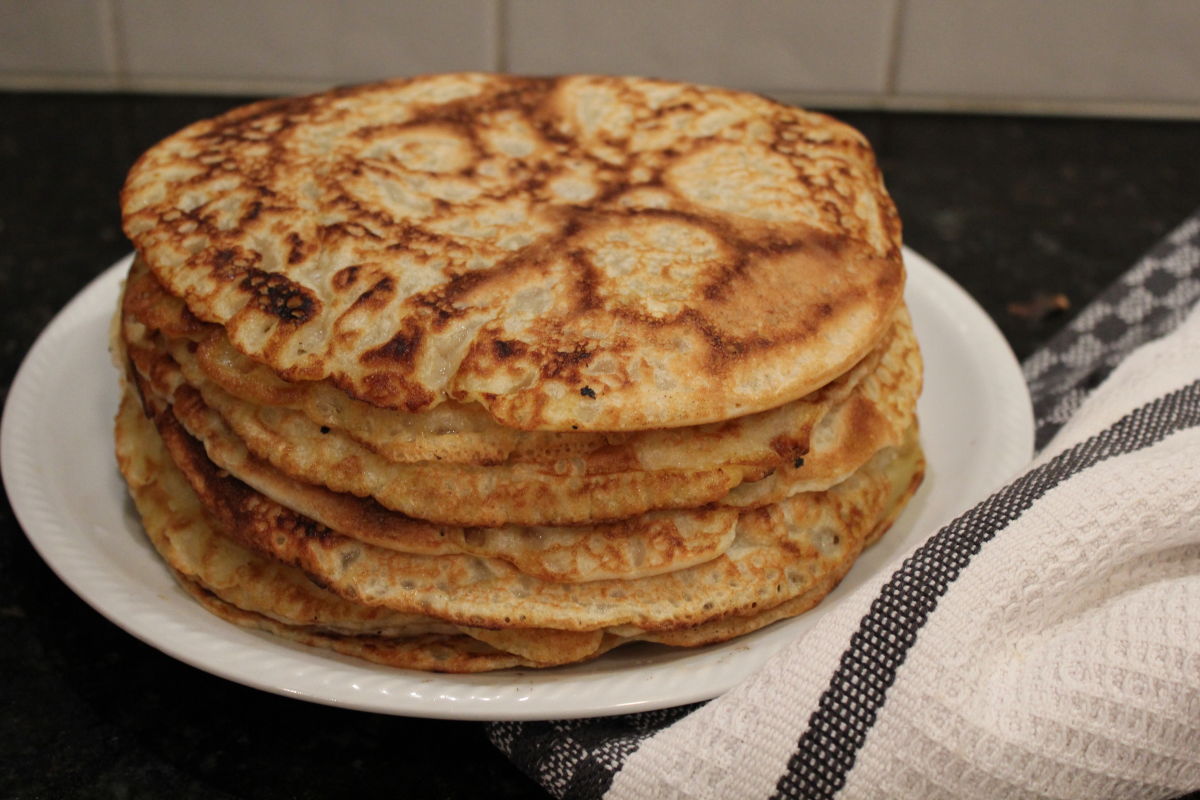
This week I made turkey rissoles. I’ve never bought minced turkey before so spent ages looking for a recipe incorporating the Asian flavours we like.

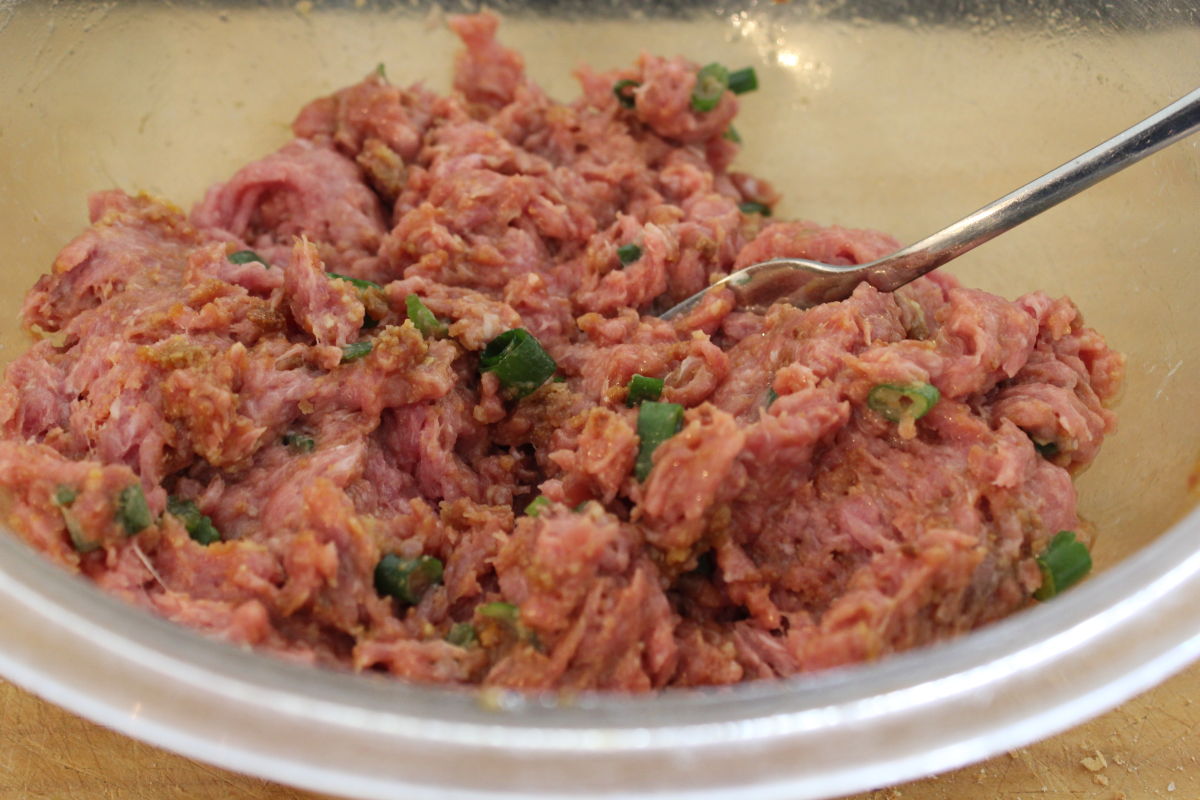
Like most rissoles recipes everything could be mixed in one bowl. I doubled the ingredients and made two lots of the mixture. The recipe used  a 450gm packet of minced turkey, the packets I bought were 500gm (1lb)

TURKEY RISSOLES

based on a recipe from  allrecipes.com.au

INGREDIENTS

  • 500gm  minced turkey
  • 1/4 cup fine dry breadcrumbs
  • 1 egg
  • 2 tablespoons minced spring onions
  • 1 clove garlic minced
  • 1 teaspoon minced fresh ginger
  • 2 tablespoons soy sauce ( I use low salt)
  • 1 tablespoon oil ( I use EVOO)
  • 2 tablespoons chopped parsley to serve

METHOD

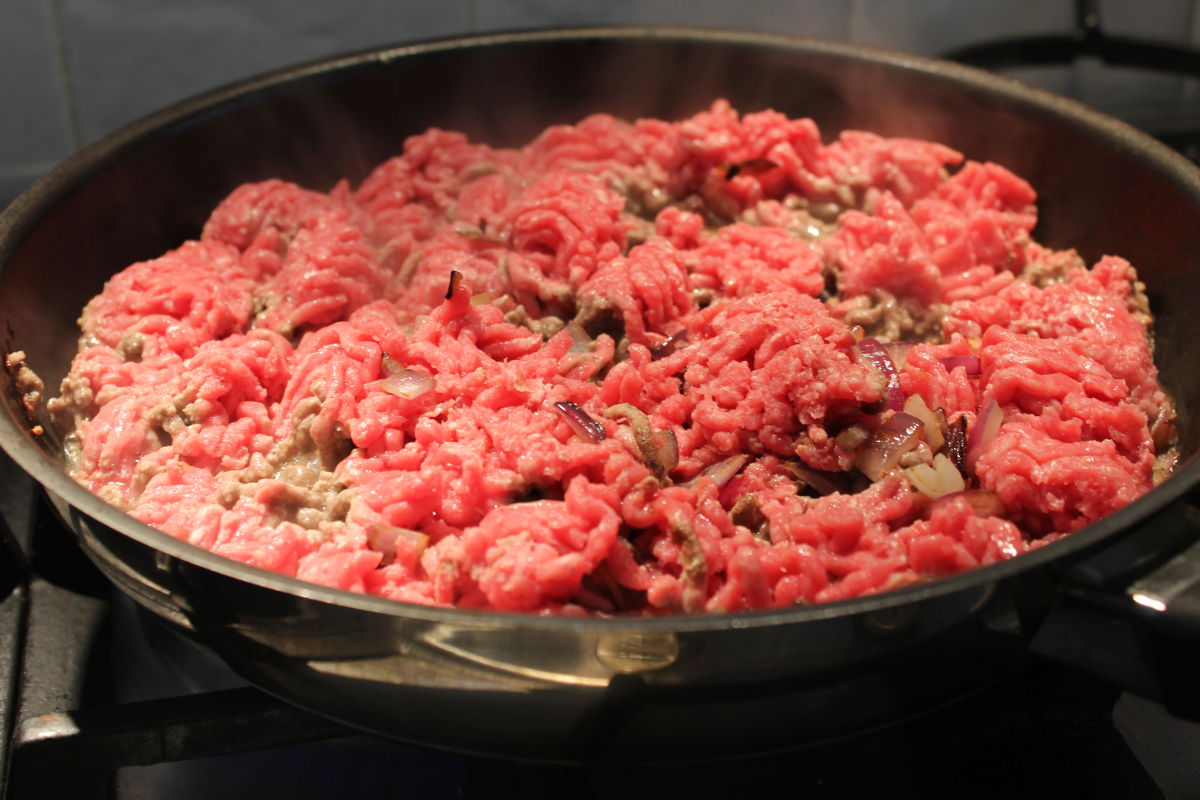
1. In a large bowl mix the turkey mince with breadcrumbs, egg, spring onion, garlic, ginger and soy sauce. Shape into 9 rissoles, or to your preferred size.

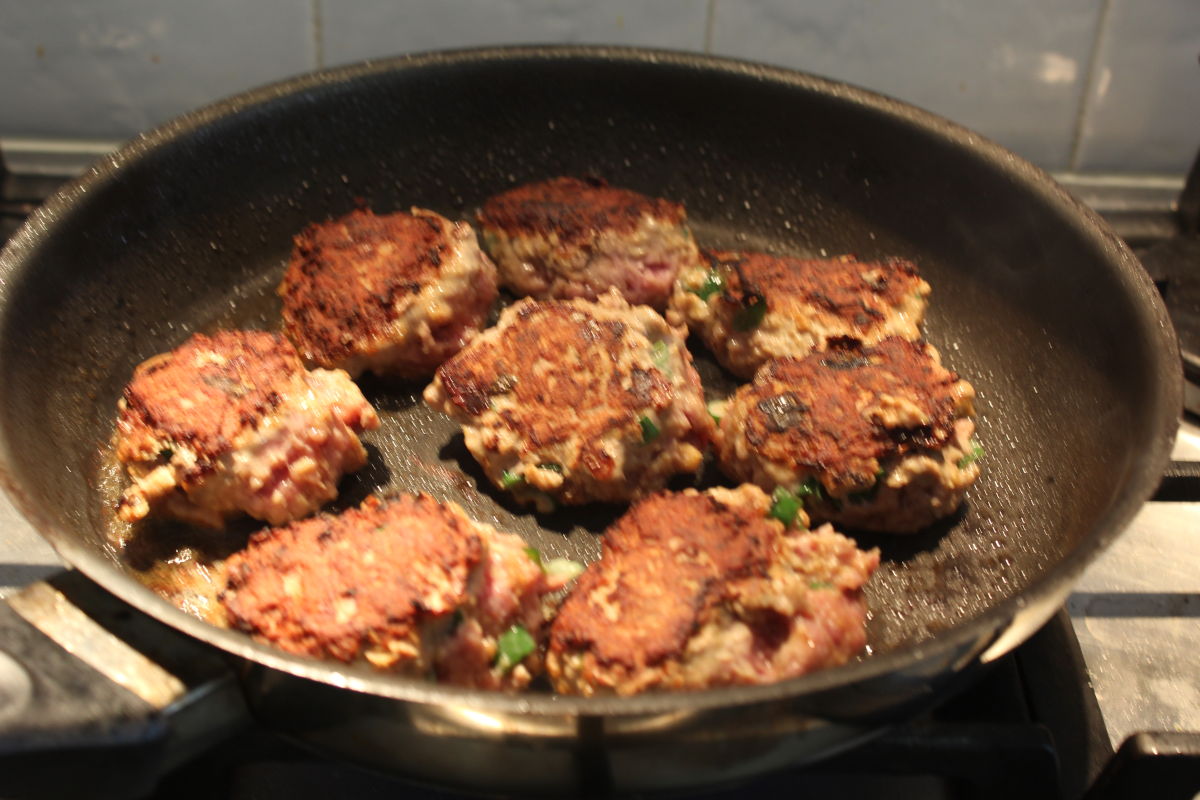
2. Heat the oil in a frying pan over medium heat and cook on each side for 5 minutes, although I found they took longer. Garnish with parsley.

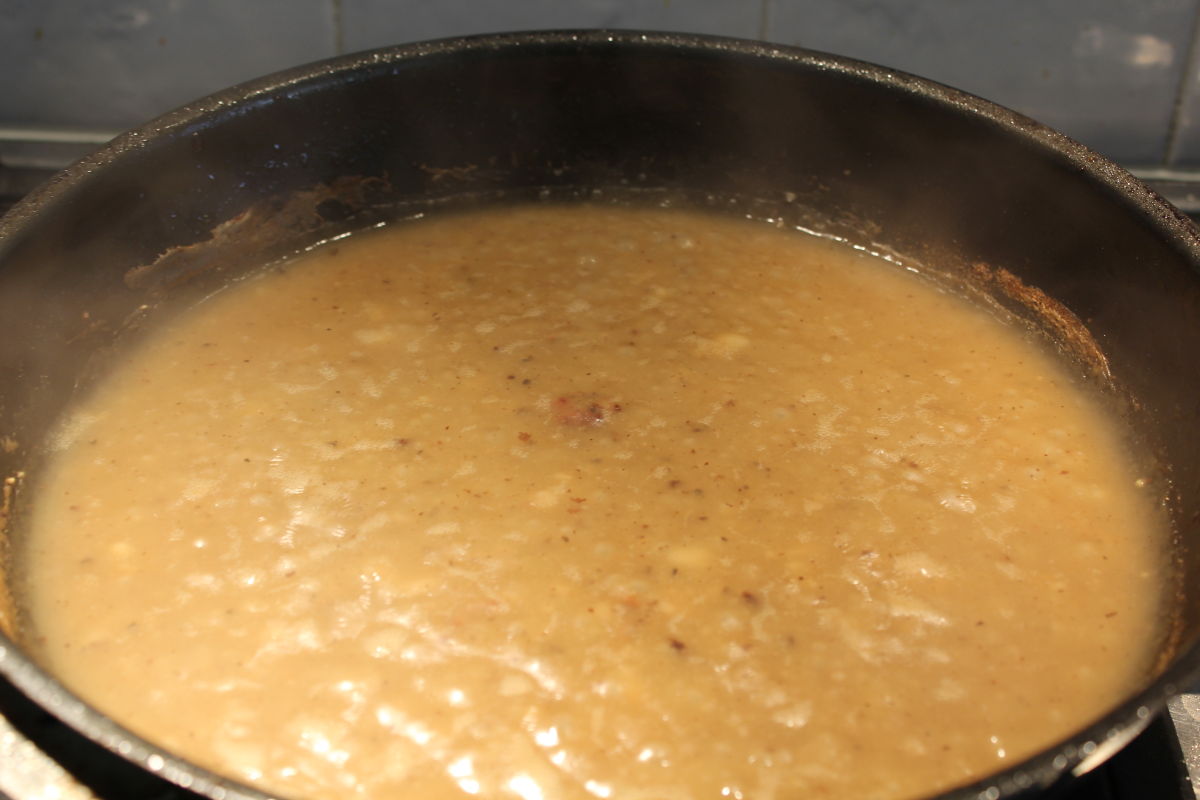
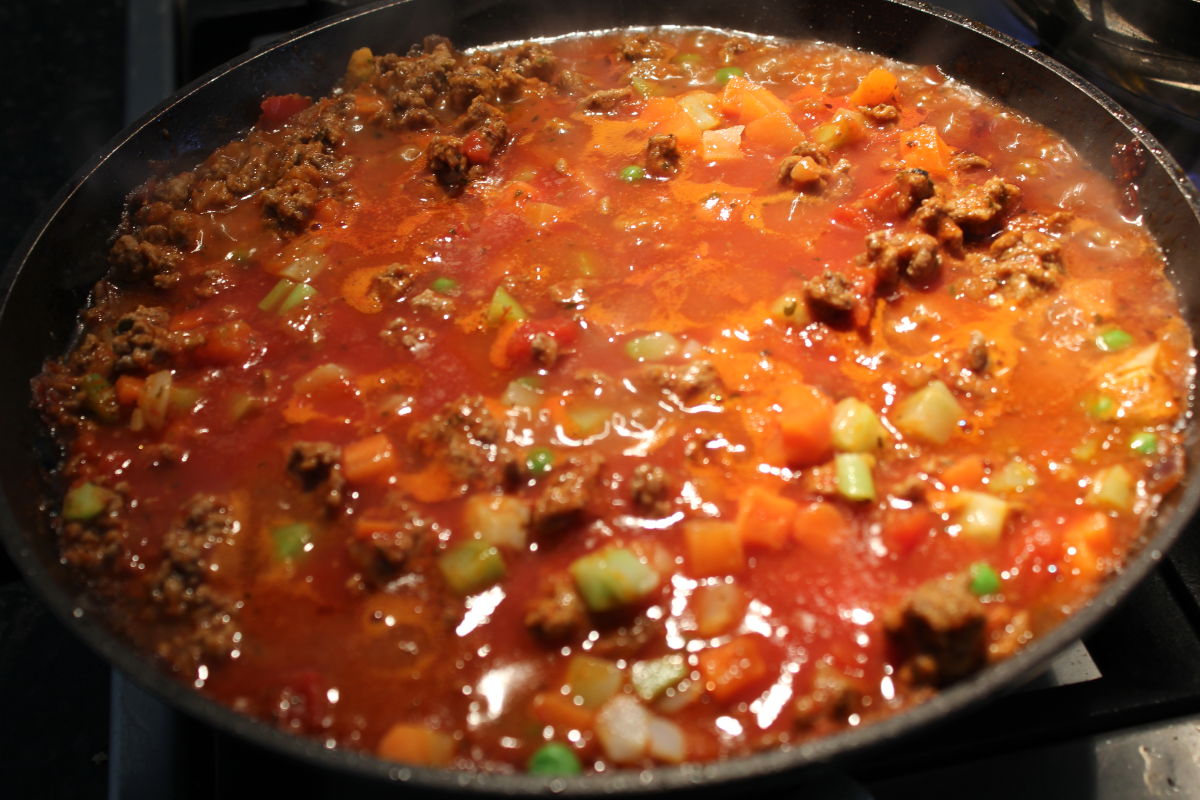
I used the pan scrapings to make a gravy, added some seasoning and when I re-heated it, a generous splash of white wine.


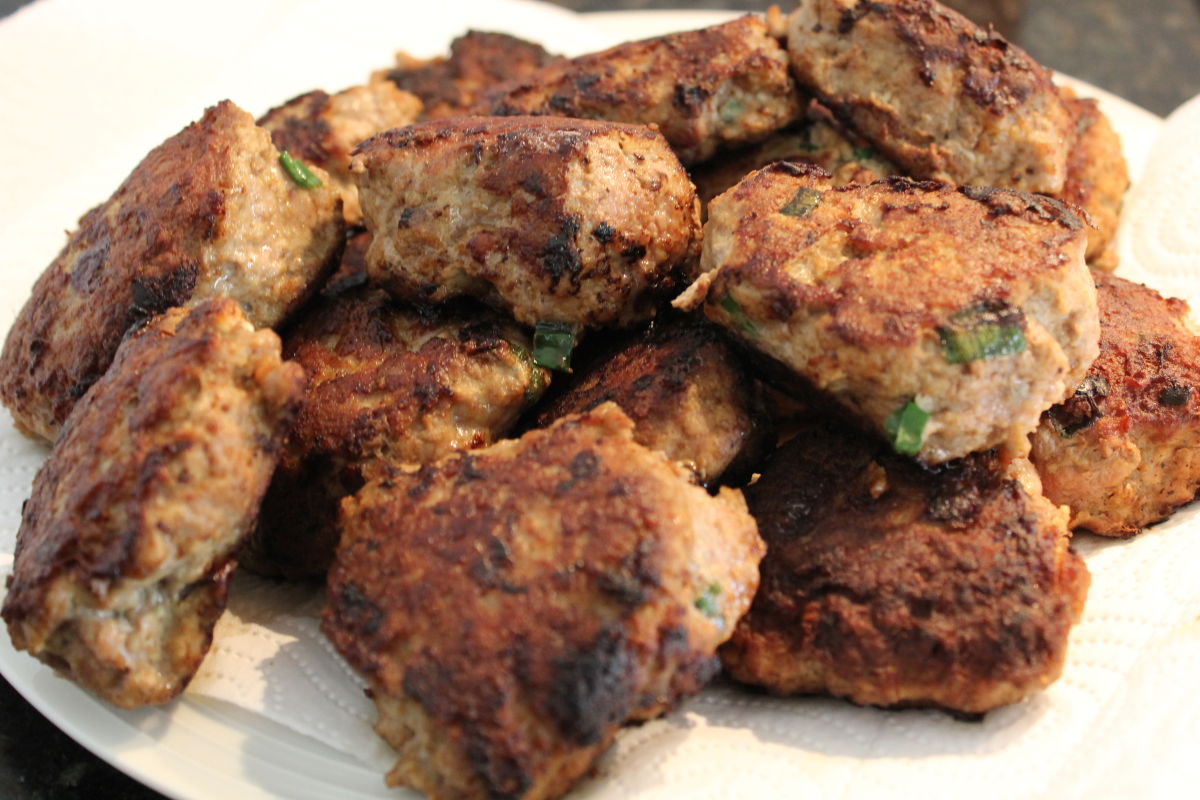
The double mixture made 18 meatballs which resulted in two meals for my family of three.

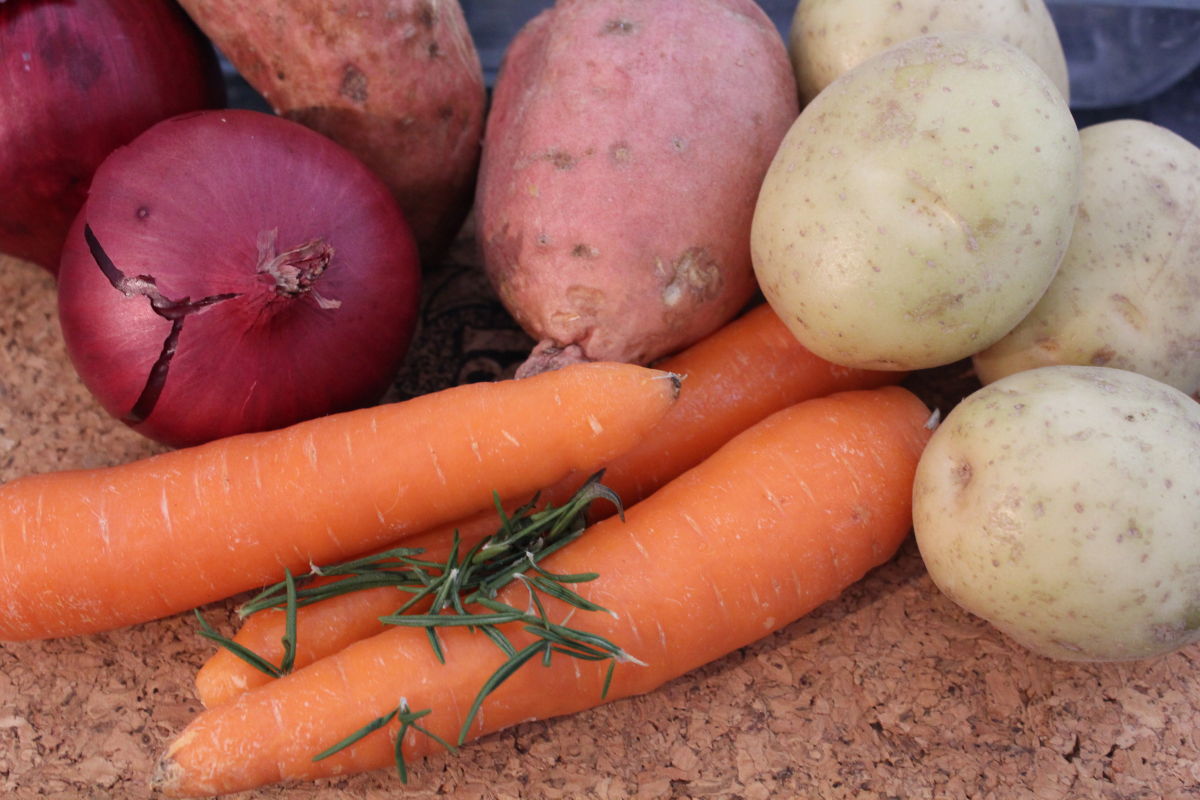
It’s been cold and wet here for a few days so I made a tray of roasted potato, kumara (sweet potato), carrot and red onion sprinkled with fresh rosemary.

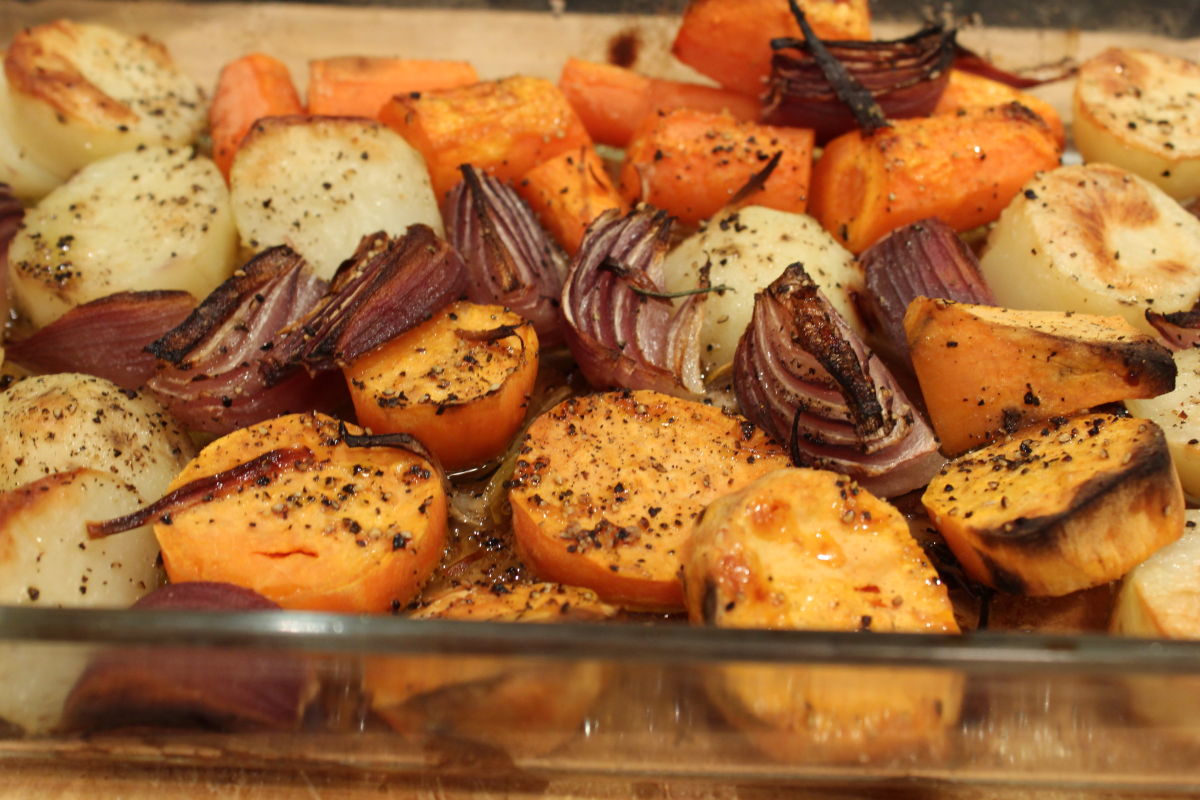
The aroma coming the oven while the vegetables and especially the rosemary were roasting was very tempting. Next time I’ll add more rosemary as it was lovely with everything.

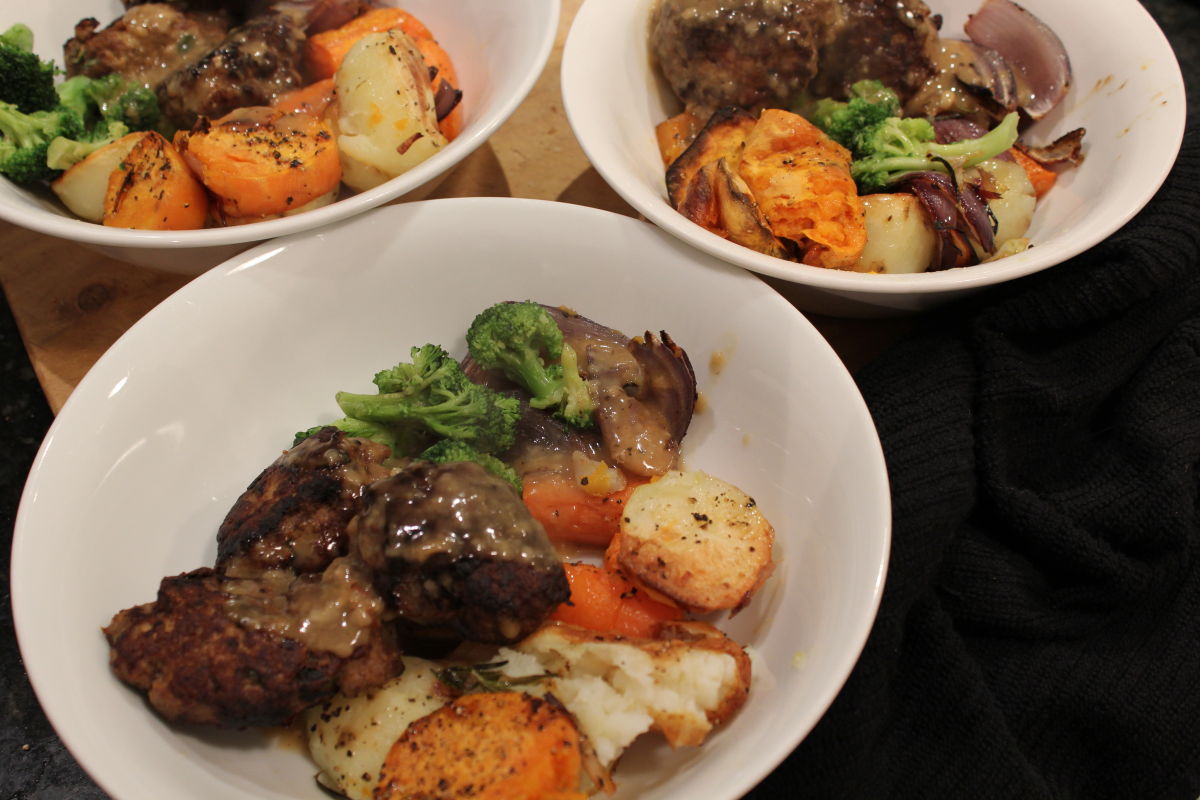
I divided the cooked patties in half and heated one lot and put the other half in the fridge. While the patties were heating I steamed some broccoli and reheated the gravy adding some seasoning and served the roasted potato, kumara, red onion and carrot and steamed broccoli in  the bowls and then added the patties and poured on the gravy.

This was a delicious dinner, especially on a cold and wet night.

A kilo (2lb) of turkey mince makes two meals for three people. I made 18 meatballs, more than suggested in the recipe, but I used more turkey mince, too, as I bought two 500gm (1lb) packages. I doubled up on all of the other ingredients and the mixture was a good consistency.

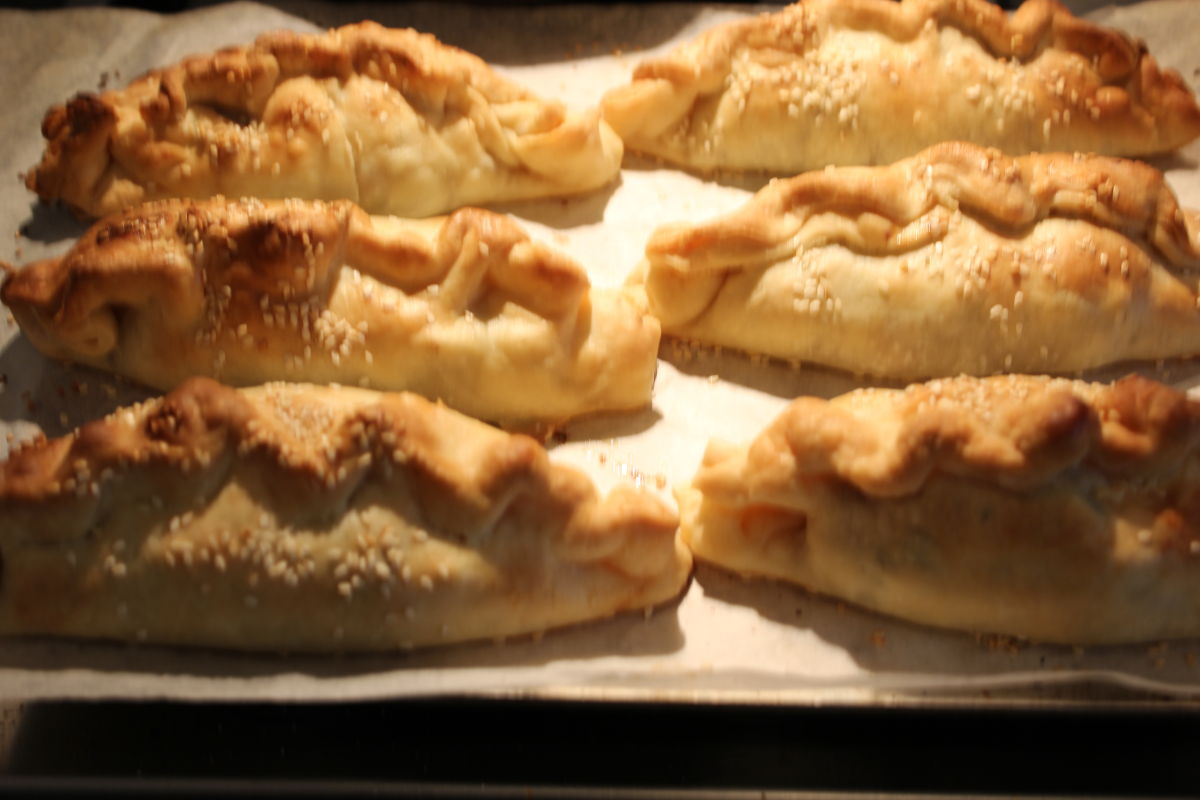
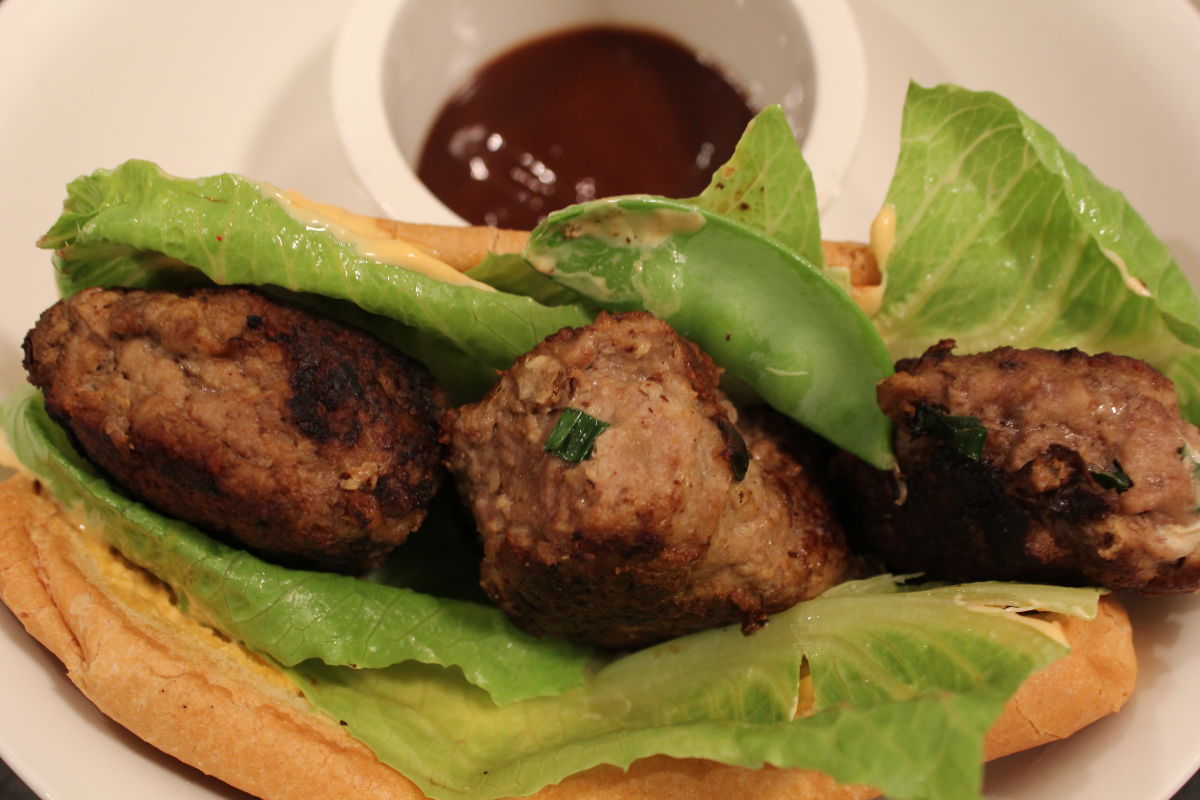
The second meal was the remaining patties heated and served in  sandwich press toasted rolls spread with sriracha mayonnaise, some cos lettuce leaves and snow peas out of the garden, all accompanied by a little bowl of Asian dipping sauce. It was very good and I’ll be making it again.

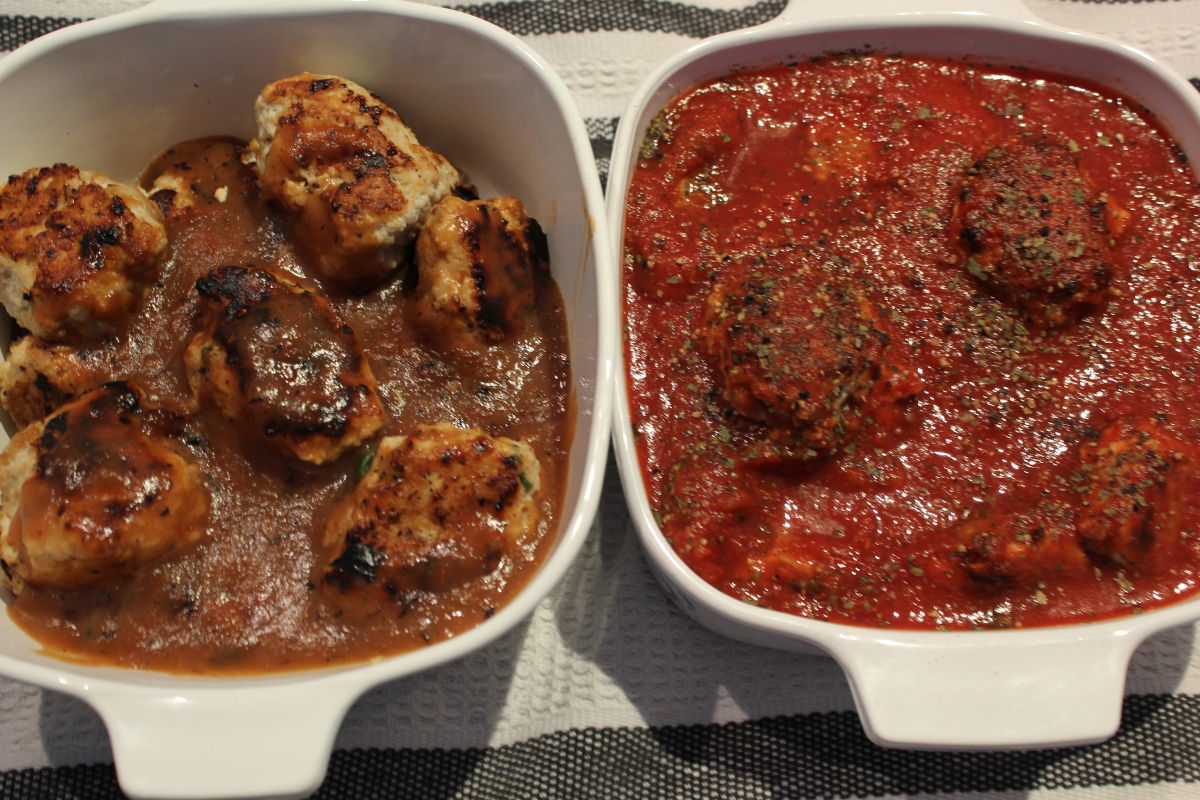
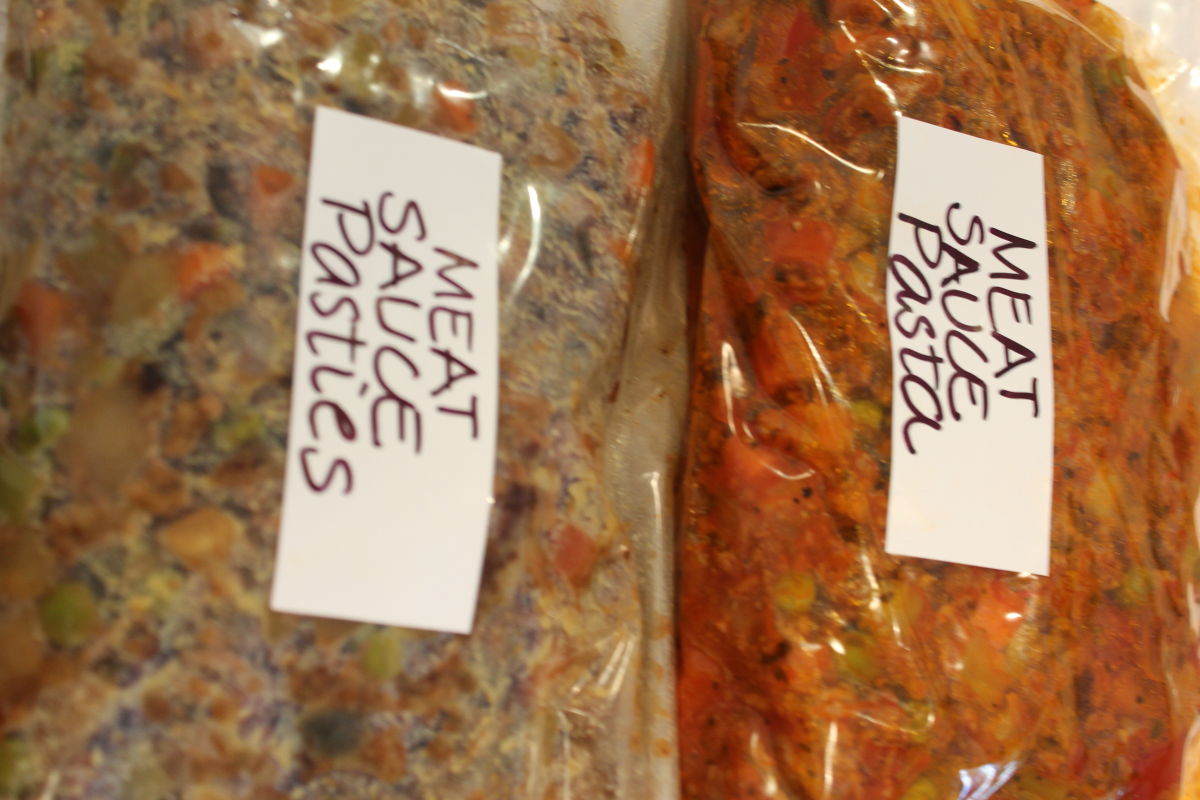
UPDATE. No minced turkey available this week so I bought minced chicken and the rissoles are really tasty. Again I made a double mixture (1kg or 2lbs minced meat) and will serve the ones in a basil tomato sauce (left) with pasta and snap peas out of the garden and the second lot (right) I made a gravy from pan scrapings, cornflour, some chicken stock and water then poured it over the rissoles and I will serve these with mashed potatoes and steamed vegetables.

Tomorrow is Milk Chocolate Day. Milk Chocolate is a mix of cocoa solids and either dried milk or condensed milk. Chocolate has mood enhancing benefits due to a stimulant, theobromine and a compound called anandamide. Good reasons to enjoy some chocolate today!


Share this post
Share

Here and Now

Share this post
Share

Today I am joining the Here and Now link up with Sarah from Say! Little Hen. I really enjoy her blog and have discovered some other blogs I really like reading, too, through the link up.

LOVING//  The newly pruned roses are already showing regrowth, so spring is coming! The arum lilies are lush and  blooming, too. I know they’re classified as weeds in Australia but I love the shape and contrast of striking green and pure white. I have done some water colour paintings of them over the years.


EATING//  I make a loaf of sourdough bread every few days. I like the rustic, imperfect shape and it tastes so good.


DRINKING//  Although I’m careful about how many coffees I have each day, I start every day with a double espresso.


FEELING//  Surprised at how quickly my retirement date has arrived. I officially retire tomorrow after 41 years as a teacher with the Department of Education. A difficult decision but now I’m filled with plans for traveling, craft and gardening and so many other things.


THINKING//  How interesting it is to be home at this time of the year and see how the sun reaches into the house and warms the tiled floor.


DREAMING//  Spring in the garden. We’re re-doing a garden bed which has always struggled. So, new soil and then I can plant out the cream clivias I have grown from seeds.

Did you know today is Emoji Day? Emojis have become fully fledged animated faces and symbols. These textual expressions evolved from early Japanese phones which then captivated the world market. Emoji is E, Japanese for a picture and MOJI, for a character. Once only on phones, emojis are now found on every device. Have fun with emojis today!


Share this post
Share

Three Books and Two Films

Share this post
Share

READING

From the library “The Choke” by Sophie Laguna, is a story about relationships in rural Australian told by an abandoned toddler, Justine,  being raised by her grandfather, an old man tormented by memories of his time on the Burma Railway. This harrowing story is well written but the underlying sexual violence, the obvious neglect of the child and the alcohol fueled violence within the family result in a very disturbing book.

Ignorant, neglected and with undiagnosed dyslexia, when Justine becomes pregnant at 13, she’s sent off to another town to have the baby. The grandfather believes he has made arrangements for the baby to be adopted, but Justine has other plans, and supported by an aunt she rarely sees, she keeps him.

I know this was supposed to be a happy ending but all I could imagine was a 14 year old with no experience of mothering, poorly educated, no income and living with her childless aunt and partner with no idea about raising a happy, healthy child. All a bit sad, really.


The author, Alexandra Joel, wrote this biography “Rosetta: A Scandalous True Story” about her great grandmother who deserted her child, Joel’s grandmother, as a five year old having already divorced the father. The great grandmother then ran away with her Australian Chinese beau, first to Sydney from Melbourne and then to the UK, where the pair practiced “Japanese” medicine, hypnosis and gave massages. Their clients  and friends included aristocrats and royalty and their business flourished.

When WW1 broke out they returned to Sydney and continued to increase their wealth. Rosetta never attempted to contact her child and left her fortune to her third husband, a man forty years younger than herself.

A brilliant story about escaping a stifling environment and re-inventing yourself, but also another example of how being abandoned can impact on children. It was a fabulous snapshot of Australia from the beginning of the century until more recent times.


My favourite book this week is “Picardy” by Marian Somes. This memoir charts the family’s first garden of native Australian plants, through to a mixture of Australian and European plantings and finally, greatly influenced by trips to France, a large, fully blown, very French garden in Victoria’s Gippsland region. ( You can click on the bookcover or title to view and buy the book)

The Somes’s have build a rammed earth home intended to look like a French farmhouse, a dovecote and a barn which look lovely but it’s the garden they have created on their 26 acres which steals the scene. They have a cutting garden, annuals and perennials, a vineyard and olive grove, a trufferie and orchard, vegetable gardens and general  planting to create a visual feast.

Somes is an accomplished cook and some recipes are included, but the most stunning part of this book is the gorgeous photos. A lovely read which left me itching for more land!

WATCHING

The Guernsey Literary and Potato Pie Society film was as good as the book and lovely. The lead, Juliet (Lily James), apparently previously worked with four of the other actors on Downton Abbey. It’s a moving film about post-war friendships, love and books. A successful London based author travels to Guernsey after corresponding with a member of the book club. A beautifully told but sad story with a happy ending and an amazing travelogue for Guernsey!

Dame Maggie Smith, Dame Peggy Plowright, Dame Eileen Atkins and Dame Judi Dench gather occasionally to reminisce. All stars of the English stage and films, the ladies talk is interspersed with  flashbacks of them in various roles.  Full of wit and wisdom, these iconic women share their memories of when they were bright young things through to their roles now days. The filming seems to take place in one afternoon and was very entertaining, although a little stiff at times.

Tomorrow is Shark Awareness Day

Researchers claim that about 100 million sharks are killed by humans every year. Thought to have evolved over 420 million years ago, sharks are older than dinosaurs. Their population is increasing every year.

I live in Australia, where in 2017, more than 66 shark attacks were recorded, with 20 being fatal. The State and Federal governments struggle to find an equitable solution to this problem so that humans can safely share the oceans with the sharks.

 
Please leave a comment

Share this post
Share

How To Make A Concrete Ball

Share this post
Share

I made the concrete ball in the front of the photo intending to cover it with mosaics but I like the colour so much I’m going to leave it in its natural state.

It’s not totally smooth but I like the uneven texture.

I’ve made these balls before using a stiff rubber ball as the mold but this time I used a plastic light shade I found on the verge intended for the council verge pick up. Every few months we put unwanted things on the verge for collection but before they’re collected lots of people take things they can reuse ( recycle,upcycle). A great way to reuse things rather than send them to land fill.

The light fitting is perfect for the job as it has a “neck” a little stand for the finished ball. I  washed, dried and then stood the light fitting in a plastic plant pot.

You need:

1. a mold which can be anything round like a hard ball or a light fitting. If    you use a ball, cut a round opening in the top for pouring the concrete in.

2. a “stand” for your mold. I use plastic plant pots.

3. quick set concrete and a jug of water

4. a bucket and stirring stick

5. rubber gloves

Mixed some concrete in an old commercial food bucket using a bamboo garden stake as a stirrer. I make it runny enough to pour but not too wet.

Poured and packed the concrete into the mold wearing rubber gloves for protection, bumping it on the bricks every now and then to prevent too many air bubbles.

Removed the light fitting from the stand after it had dried for two days and left it two more days as we’d had very wet weather but it was completely dry anyway.

Wrapped the dried out concrete ball still in the light fitting in a thick polythene bag. If you’ve used a rubber ball you’ll need  a trimmer to cut it in half to peel it off.

Put on protective goggles and tapped the brittle plastic with a hammer to break it.

Used a screw driver the lift and crack off the plastic shards.

It’s finished and I’m really pleased with the colour, smoothness and size.


July 3rd was International Plastic Bag Free Day. In Western Australia the main supermarkets have stopped supplying free single use plastic bags. Shoppers need to take their own fabric, straw, woven polypropylene, thick plastic bags or boxes for their shopping or buy multiple use bags at the checkout.

The intention of the day is to raise awareness of the brief use made of plastic shopping bags for carrying our purchases but magnifies the problem when they enter our environment, especially waterways.

Share this post
Share

The Big Cookup

Share this post
Share

I started the process to make sourdough today but it’s a long business. This involves re-activating the “mother”, the starter, by feeding it some flour and water and leaving it until it froths and bubbles. While that was happening I began making pasties.

To make very easy pasties brown two medium onions then add one kilo (2lb) of grass fed lean mince and break it up and brown that, too. Add a one kilo (2lb)  bag of diced frozen mixed vegetables, thawed and mix the meat and vegetables. When it’s all cooked add vegetable stock or water to just cover the meat and vegetables and let it cook until the vegetables are ready, then thicken it with plain flour and water and let it cook for 5 minutes.  I add some salt and ground pepper and cook it for about 10 minutes longer before  turning off the heat and leaving it to cool. Most of the liquid should be cooked off by now. I forgot to take a photo of this stage and also of cutting bread and butter plate sized circles from bought sheets of pastry, putting filling in the middle and folding the ends and then the top and pinching the top seam. Brush with milk wash and sprinkle with sesame seeds. Bake until golden brown. No photos, sorry!

While the filling was cooking for the pasties I made a pasta sauce browning  a chopped onion and then adding and browning 500gm (1 lb) grass fed lean mince, then some more diced vegetables, a chopped tomato, some dried basil and a 500ml jar of passata and let it cook for about 45 minutes on low heat.  Left it to cool before freezing.

Meanwhile I prepared this cinnamon and pear teacake. The pears sank into the mixture but it still tasted wonderful served with icecream and sprinkled with icing sugar.

I also prepared and cooked these Apple Rose Cakes and they look funny but they taste very good! These are my first attempt and I slowly got the hang of placing the apple and rolling the pastry.

I’ll make these again as they were very popular.

These pasties smelt wonderful cooking and we’re really looking forward to eating them.

By now the “mother” was ready and I began the sourdough. It is still doubling in size and I will cook it in the morning.

Freezing the surplus pastie filling as I ran out of pastry and froze the pasta sauce to use later. The freezer is almost full so I transferred the filling and sauce into ziplock bags so I can stack them.

The dough had more than doubled in size by morning so I shaped it and put it to cook in a Dutch Oven. The surface looks funny because it expanded so much during the night it stuck to the cling wrap.

The dough has rested again and it’s time to put it in the oven to cook.

Slashed and ready to bake.

Beautiful sourdough, always worth the effort.

Today is Camera Day. Instead of putting film in your camera, taking your photos, taking them in to be developed and then possibly discarding some of the processed photographs which you don’t like, now you can aim and click, then review and discard or keep. Do you print your photos or just share on social media?

Share this post
Share

Growing Mushrooms, Some Garden Repairs and Scrumptious Shortbread

Share this post
Share


GROWING MUSHROOMS

Do you love mushrooms? I’m the only one in my family who eats mushrooms and decided to try a boxed “Mushroom Farm”. Followed the instructions and misted the box everyday and waited.

Fifteen days later the first mushroom appeared!

Closely followed by some more.

Weighed the two crops I got and found I’d grown 156 g of mushrooms. What a flop! I could buy 1.5kg of mushrooms from the grocery shop for the $15.00 I paid for the mushroom farm. There was no second crop so the whole lot went into the garden as soil improver.


GARDEN REPAIRS

This gap between two lots of paving was cracked and some of the old pebbles were becoming loose. I dug out the old pebbles and concrete. The channel shows our grey, hopeless beach sand which needs the constant addition of nutrients

Mixed a bucket of quick set concrete using a recycled bucket from the local deli; it used to hold olives. Mixed it with a stick and poured it into the channel.

Smoothed it out and collected the pebbles I had cleaned and could re-use and included some new ones, too, partially burying the pebbles in the concrete.

The job is nearly finished. I hadn’t cleaned the pebbles with a wet rag when I took this photo. Two days later it has set well and is now clean.


SCRUMPTIOUS SHORTBREAD

I have a friend who often talked about the scrumptious shortbread her mother’s cousin, Nancy, used to bring when she was visiting. Nancy is a close friend of my mother’s and I was delighted to be given her recipe and couldn’t wait to try it. I’m glad I did as it is very, very good.

Cream 7 oz of butter with 3 oz of caster sugar and 1/2 teaspoon of vanilla essence. I discovered my electronic scales can be used in metric and imperial settings which was very helpful. Add 9 oz of plain flour sifted with 2 oz of rice flour. Mix and roll into a ball. I pressed it into a glass tray, rolling the top flat with a small rolling pin.

Cut finger shapes into the dough and prick with a fork then put it in the fridge for an hour.

Bake at 140 C fan forced for 45 minutes then leave it to cool. I ran a knife along the existing cutlines and that made it easy to get the fingers out when the shortbread was cool. This is good shortbread, tasty with a light texture.

Today is PINK DAY. Pink didn’t describe a colour until the 17th century. Before that, pink meant to create a perforated or punched pattern (think pinking shears) Pink, the colour, was previously known as rosy or pale red and remains the colour of romance. I hope you are in the pink of good health.

To celebrate I’ve bought some black and pink, not black and red, journals which are awaiting covers and marbled lining papers.


Share this post
Share

How To Make A Simple Lined Drawstring Bag

Share this post
Share


Every couple of days I make fresh bread and had no good way to store it. I wanted a breathable container which would look attractive on the kitchen bench and be easy to keep clean. I realized a drawstring bag would work well.

Wanting the bag to be 100% cotton I looked online as we have very few fabric shops in Perth but then I remembered a set of tea towels I’d been given as a gift. I washed the black waffle and the patterned black and white tea towels. So glad I did as they both shrank, particularly the black one. Next job, a label.

Printed the word BREAD on paper then carefully glued a blank sheet of A4 paper to a piece of white fabric and trimmed the fabric to be an exact fit and put it through the printer on the COPY setting. I ironed the inkjet print to set the image and trimmed the fabric to the size rectangle to suit the bag. Then I turned the edges under and tacked it onto a larger rectangle of red gingham, ironed the edges under and tacked that, too.

To make the bag I trimmed the hems off each tea towel, which determined the size of the drawstring bag. The black tea towel was noticeably smaller. I pinned, then sewed the bottom and side, leaving the top open.  This is the liner for the bag.

This meant I could estimate the finished size and enabled me to pin and sew the BREAD label on the front.

Next, I sewed the printed fabric slightly bigger than the black liner, leaving 5cm at the top to turn over to make the channel for the drawstring. I turned this the right side out and ironed it. Next, I inserted the liner and turned the patterned edge over the raw edge of the black waffle liner. Then I stitched the edges of the drawstring channel and finally, sewed the channel.

The sewn edges of the channel.

Attached a safety pin to the tape which I cut three times longer than one side of the top then fed the pin through the channel.

Fed each end of the tape through wooden beads then knotted the raw edge of the tape. Ironed the finished bag and put a fresh loaf of bread in it.

Looks good, works well and follows the red, black and white theme on the kitchen bench. Last week I blogged about making the tissue box cover, also in black and white.

The sourdough fresh from the oven and about to go in the drawstring bread bag. I followed the recipe for sourdough from The Clever Carrot blog. It was cooked in a Dutch Oven. The strange hole on the left side of the loaf was made by using the thermometer to test the temperature to ensure it was properly cooked.

When I was feeding the “mother”, the starter for the sourdough, the directions advised to keep a cup and discard the rest. To avoid such waste, I added an egg and some more flour and water, let the batter rest and made a delicious pile of pancakes. They were very good.

Tomorrow is Fresh Veggie Day, so you can plant a winter crop or eat some fresh veggies, raw, steamed, boiled or roasted. Enjoy!

Share this post
Share

How To Make A Tissue Box Cover

Share this post
Share


My husband insists on handkerchiefs, has an enormous collection and uses one every day. I prefer tissues. I mostly use them in the bathroom but have a box of them in the kitchen, too. I’ve finally found a brand of economical tissues I like as they are soft and strong, but the box they’re packed in is not attractive. Actually, the boxes are ugly.

The tissue box in the kitchen needed a cover to fit in with the other things on the bench which are mostly black and white with a dash of red, the new kettle.

YOU NEED

  • a deconstructed tissue box
  • a sheet of strong cardboard. ( I cut up a box.)
  • scissors
  • a trimmer
  • a ruler
  • glue stick for covering and a contact adhesive for joining the sides
  • a sheet of gift wrap or 2 sheets of printed A3 paper or whatever you want to cover the box
  • brown paper to line the box (optional)
  • gel medium ( I used Modge Podge) and a brush

Went to the craft shop to buy a compressed wood tissue box to cover and discovered they’re now made of cardboard. I had lots of cardboard at home and decided to make my own box.

I deconstructed an empty tissue box,  laid the pieces on  the cardboard then marked out the shape using a pen and ruler, adding 15mm to all the pieces so the cover slips on and off easily.

Cut and bend the fold lines along the edge of a table and press with a boning tool or  press with your scissor handles.

Using the trimmer, I cut into the top layer and core of the cardboard on the side folds to make them thinner so they’d sit flatter. I needed to almost scrape off the layers.

Contact glue to hold the joined edges. These glues are usually stinky, but dry quickly and hold well.

The handiest craft tools – pegs! I find them so useful. Here they hold the glued sides in place until they’re set.

Check the box sits flat and trim if necessary then carefully use a craft knife to cut out the oval traced from the original box.

Begin covering the box on one side and continue the paper into the inside. Make sure you glue the entire panel you’re covering before you press on  the paper so it sticks smoothly. Rub any bubbles to flatten them.

Snip repeatedly around the oval opening, smear the wrong side of the paper with glue and press each piece down to make a smooth finish.

Using the deconstructed lid of the original box, measure and cut a lining piece out of brown paper. I folded the rectangle in half longways to mark and cut out the oval.

Measured and cut a long strip to finish lining the sides inside.

Elevated the covered box and coated it with gel medium ( Modge Podge) to make it strong and water proof.

The finished product! No ugly box, just a strong, easy, inexpensive cover.

Really happy with how the cover turned out. Later I went to the hardware store and they had the compressed wood tissue boxes to cover! Too late, I’d found out how easy it was to make my own.

So pleased with the kitchen tissue box cover I made one for our bathroom. The French labels on all four sides are from Graphic Fairy.

Today is World Oceans Day. Introduced in 2013, the focus is on promoting healthier worldwide oceans, specifically by reducing plastic pollution. Single use plastic bags are being phased out at many supermarkets this month in Australia and many people are using their own insulated mugs for takeaway coffee and refusing plastic straws, another major pollutant. Small changes, big outcomes.

Share this post
Share

Eating In Bali

Share this post
Share

Bali produces a huge range of fruit, vegetables, herbs and spices and is a mecca for good food having attracted many established chefs from all over the world who have combined Balinese tastes with many other styles. This has resulted in options for all tastes and budgets spread widely across the island.

In Seminyak, on Jalan Kaya Aya you will find Chandi’s, offering modern Indonesian and Asian food with a blend of many other styles too. Chandis is where we head for our first meal, many during our stay and often our last as well.

They make the best margaritas. And the best double espressos.


Meat is imported from Australia and New Zealand.

Warm friendly staff and a lovely setting. (Menu online.)

Chandi is an old favourite, our new discovery is PEARL.

Read a review for Pearl and was attracted by the blend of traditional French cuisine mixed with Balinese flavours. It was a good choice. Well away from the road in Legian, this alfresco fine dining brasserie was green, cool and very pretty with sparkling fairy lights in the trees, but the real star was the food.


Head chef Jeremy Blanchet cleverly combines French techniques with local produce and the result was wonderful. Delicious food, beautifully presented.

Great cocktails, great food, lovely staff and a wonderful night.                  (Menu online)

I neither sought nor was paid for these reviews.

May 25th was Sun Screen Day, obviously intended to acknowledge the beginning of summer in the northern hemisphere. Sunscreen, a cream or spray, is applied to the skin to protect it from the Sun’s harmful ultraviolet rays and sunburn and can lessen your chance of developing skin cancers, or melanomas

According to the Cancer Council of Australia, two in every three Australians will be diagnosed with a skin cancer by the age of 70. They estimate in 2018 14,320 new cases of skin cancers will be diagnosed in Australia.

Until recently, Australia had the highest rate of deadly skin cancers in the world, but due to decades of public health campaigns, that claim has been ceded to New Zealand.

So, re-apply sunscreen regularly, wear a hat, stay out of the sun in the hottest times, particularly in Australia, New Zealand, North America and Canada.


Share this post
Share

Where We Stay In Seminyak, Bali

Share this post
Share


When I tell people we’re just back from a holiday in Bali the first comment people make  is, “Lucky you” and the second  is always, “Where did you stay?” About 1.4 million Australians travel to Bali every year and enjoy an enormous range of accommodation choices in many areas.

We keep returning to Kamuela Villas  because they are close to the exciting chaos of Seminyak (wonderful restaurants, massages, lots of pampering, shops and cafes) but up a quiet street, calm and serene and very peaceful at night. The Manager and staff are so helpful and lovely!

The legendary Balinese hospitality begins when you’re collected  from the airport  in clean, cool 4WDs and transported  to  Kamuela reception, where you’ll enjoy a welcome drink before going to your villa.

Entrance to a one bedroom villa. These have less garden but each has a roof top terrace with great views and cool breezes. The villas are air conditioned except in the bathrooms which have fans.

Lush tropical gardens. Bali has world class restaurants and some days we have breakfast and one other meal and have a little picnic by the pool instead of a third, full spread. There’s a deli up the road with cheese, crackers, vegetables and fruit for in villa picnics.

The locked entrance gate means your villa is private and secure. The villas and pools are cleaned daily.

King sized beds with garden and pool views. All the rooms are light, airy and spacious with soaring ceilings and timber floors in the living areas and tiles in the bathrooms.

Order your breakfast and your preferred delivery time the night before and  the lovely, smiling Balinese staff will arrive and set things out, ready for you to eat. We tried the English, French, American, Indonesian and Japanese breakfast choices and liked them all.

A variety of food can be ordered from the room menu ranging from snacks to three course meals.

The fruit in the front, left side, is a reptile fruit, with white flesh and a sweet, chewy texture.

We swim in the morning, in the afternoon and after dinner!

The tropics can be harsh on the buildings and a refurbishment program is planned.

Spacious bathrooms with showers and baths. Bottles of water provided….don’t drink the water in Bali!

Each two bedroom villa has a shared living space with sitting, dining and kitchen areas and two complete bedroom en suite units housed in three pavilions  featuring these soaring ceilings. So beautiful.

Every time we stay we come home relaxed and blissed out, vowing to return as soon as possible. It is all so easy.  Airfares are so low, Kamuela so accommodating  and the staff so lovely. See it at                 www.kamuelavillas.com

Yesterday was Tiara Day, quite fitting following the Royal Wedding, but probably not very relevant for people in the suburbs with few commitments requiring a tiara. Apparently, Tiara Day is the same day as Queen Victoria’s birthday. I’m sure she had some gorgeous tiaras!

Share this post
Share
Share